Tuesday, February 15, 2011

Asian Chicken Salad

I was in the mood for something Asian-flavored with peanut sauce (I love peanut sauce and well, all things peanut butter), so decided to try to perfect a Asian Chicken Salad.  Using a combination of chopped peanuts and a soy and vinegar dressing with peanut butter, it has just the right amount of peanut flavor.  I added a little bit of Sriracha sauce, to give it a little kick.  Feel free to add more of it for more spice, but what I added was just enough to give a little flavor (but wasn't spicy at all).

The result is a colorful chicken salad packed with a lot of flavor.  And you can't ignore the nutritional benefits of this salad.  Cabbage is loaded with Vitamins A, B, C, E, and K, fiber, folate, and low in calories.  Bell peppers are loaded with Vitamins A & C and antioxidants and carrots provide carotenoids and Vitamins A, K, and C.

If you want to go vegetarian, you can simply leave out the chicken.  You can also use any type of cabbage you'd like--green is most popular, but I used red cabbage (has more antioxidants and basically, is prettier)  in this recipe.


Ingredients:
Salad:
6-8 Cups Red Cabbage, Shredded (1 head cabbage)
2 Red Bell Peppers, Cut Into Strips
3/4 Cup Carrots, Shredded
3/4 Cup Peanuts, Chopped
1 Bunch Cilantro, Chopped (roughly 1/2 cup)
1 lb. Chicken Breasts, Cooked and Cubed


Dressing:
1/4 Peanut, Olive, or Canola Oil
1 tsp. Sugar (or Agave Nectar or Honey)
3 tsp. Ginger
1 Tbsp. Minced Garlic
1/4 Cup Low-Sodium Soy Sauce
3 Tbsp. Rice Vinegar (could sub Apple Cider Vinegar)
2 Tbsp. Peanut Butter
1 tsp. Sriracha sauce (to add a bit of spice)

Directions:
1. In a large salad bowl, stir together all the vegetables (cabbage, bell peppers, and carrots), peanuts, and the chicken.  Stir to combine well.
2.  In a small bowl, whisk together the dressing ingredients.
3.  Pour the dressing over the salad and toss or stir well to coat.

Garnish with chow mein noodles, toasted slivered almonds, chopped green onions, or mandarin oranges if you desire!  To make it a vegetarian meal, just leave out the chicken.

Enjoy!

Asparagus, Goat Cheese, and Lemon Pasta

I have been in the mood for a delicious and fresh, yet creamy pasta dish lately.  I came across this recipe by Bon Appetit and Smitten Kitchen and had to try it.  I've adapted it slightly to my own tastes.

This meal combines the rich, creamy flavor of goat cheese with fresh lemon and asparagus.  The base of the meal is whole-wheat pasta.  The result is a light and healthy-tasting meal.  And it's not just healthy, but really delicious and easy to make.  Enjoy each bite.

Ingredients:
1 lb. Whole-Wheat Spiral Pasta (Fusilli or Rotini)
1 lb. Asparagus, Cooked and Cut into 1 - 1 1/2" inch pieces
1/4 Cup Olive Oil
1 Tbsp. Lemon Zest
2 Tbsp. Lemon Juice
2 tsp. Dried Tarragon or 2 Tbsp. Chopped Fresh Tarragon (could substitute Marjoram or Basil)
1 5-6 oz Soft Goat Cheese Log (don't use crumbled--it won't melt correctly)
Sea Salt and Pepper, as desired (I used 1/2 tsp. each).
Parmesan Cheese, to Garnish (optional)

Directions:
1.  Cook pasta according to package directions (Note: You can cook the asparagus with the pasta, for the last 3-4 minutes of the pasta cooking time, if you are using fresh asparagus.  I used frozen asparagus, so cooked it separately from the pasta)..  Drain pasta, reserving 1 cup of the water.
2.  In a large bowl, combine cooked pasta, cooked asparagus, 1/2 cup of reserved water, olive oil, lemon zest, lemon juice, and tarragon.  Stir in the goat cheese, breaking it into small pieces as you add it in.  Stir well to combine.  Add more of the reserved water, if you need more moisture.  Season with sea salt and pepper, if desired.

Serve immediately.  Top with fresh sprigs of tarragon or Parmesan cheese.

Enjoy!

Sunday, February 13, 2011

Pea Panzanella

I had to try this recipe out after having a wonderful Pea Panzanella at a friend's house.  Panzanella is basically an Italian dish involving stale bread and usually tomatoes, olive oil, and other herbs and ingredients.  However, the pea version doesn't have tomatoes, but certainly makes use of a number of green vegetables instead.  It's really a wonderful springtime dish and I guess the recent warm weather has me thinking spring (despite the fact it is February).

This Pea Panzanella is adapted slightly from Michael Chiarello's recipe of the Food Network.  It has a great, fresh taste and is loaded with healthy ingredients: peas, olive oil, spring greens, and fresh herbs.  I hope you like it as much as we did.  It's a great dish to serve at a party or just for something different (and vegetarian) for an everyday side dish or main entrĂ©e.

Ingredients:
Panzanella Bread:

  • 1/2 Cup Butter (1 stick)
  • 3 Tbsp. Minced Garlic
  • 1/3 Cup Minced Onion
  • 3 Tbsp. Fresh Marjoram, Chopped (or 3 tsp. dried)
  • 1 Loaf Italian or French Bread (a day old is best), Cut into 1/2-inch cubes
  • 2/3 Cup Grated Parmesan and Pecorino Romano Cheese Blend
  • 5 Tbsp. Fresh Basil, Chopped (or 5 tsp. dried)
  • 2 Tbsp. Fresh Green Onion, Chopped (or 3 tsp. dried)
  • Sea Salt
  • Black Pepper

Dressing:

  • 1 1/2 Cups Frozen Peas
  • 1/2 Cup Milk
  • 2 Tbsp. Butter
  • 1/2 Cup Chicken Broth (use Sodium-Free if you can)
  • 1/4 Cup Extra-Virgin Olive Oil
  • 1 tsp. Lemon Juice

Combined Salad:

  • 1 1/2 Cups Cooked Peas
  • 1/2 Cup Grated Parmesan and Pecorino Romano Cheese Blend
  • 5 Cups Spring Lettuce Greens
  • 3 Tbsp. Lemon Juice
  • 1 Tbsp. Olive Oil

Directions:
Preheat oven to 375 degrees F.

Panzanella Cubes:
1.  In a skillet over medium heat, melt butter.  Once well-melted, add in the garlic and minced onion; stir for 2 minutes.  Add in the marjoram and stir well.
2.  Place bread cubes in a large bowl.  Pour butter mixture over the bread and toss or stir quickly to evenly coat the bread.  Stir in the cheese, basil, and green onions.  Add a couple pinches of salt and pepper if you desire.
3.  Place the bread mixture in a single layer on a baking sheet.  Bake until the bread is lightly browned, about 7-8 minutes (outer bit of bread pieces will be crunchy and middles should still be soft).

Dressing:
1.  In a saucepan, over low heat, cook the frozen peas in the milk and butter for about 4-5 minutes.
2.  Puree the milk-pea mixture in a blender or a food processor.  Slowly add in the chicken broth, olive oil, and lemon juice.  Puree until smooth.  Cool over an ice bath or in refrigerator.

Combining the Salad:
1.  In a large bowl, combine the bread cubes and the pea puree.  Stir well to coat the cubes.  Stir in the cooked peas and cheese.
2.  Use a ring from a 10-inch spring-form pan upside down on a large plate.  Fill it with the bread mixture, pressing it down lightly into place.  Refrigerate for 30-45 minutes, then remove the ring.
3.  Meanwhile, in a separate bowl, toss the spring greens with lemon juice and olive oil.  Sprinkle the greens on top of the panzanella.  Add grated Parmesan/Pecorino Romano cheese on top.  Serve immediately.

Enjoy!

Saturday, February 12, 2011

Red Velvet Cupcakes with Cream Cheese Frosting

Red is the color of Valentine's Day, the color of love, and the color of cupcakes!  Red Velvet cupcakes are a hit with almost everyone and make a wonderful sweet treat for Valentine's Day, which is just around the corner.  For another Valentine's Day recipe, check out my Chocolate Sugar Cookies.

I've created a recipe using a combination of Vanilla Garlic's recipe on Simply Recipes and from Martha Stewart.  This recipe yields about 24 cupcakes, so feel free to half it for a small batch of 12.

Ingredients:

Cupcakes:
  • 1/2 Cup Butter (1 stick)
  • 1 1/2 Cups White Sugar
  • 2 Eggs
  • 2 1/2 Cups Cake Flour (can substitute 2 Cups All-Purpose Flour + 1/3 Cup Cornstarch)
  • 2 Tbsp. Cocoa Powder
  • 1 tsp. Baking Soda
  • 1 tsp. Baking Powder
  • 1 tsp. Salt
  • 1 Cup Buttermilk (Note: You can make your own buttermilk by combining 1 Cup Milk + 1 Tbsp. Vinegar and letting sit for 10 minutes)
  • 1/2 tsp. Red Food Coloring (use gel) (or use beet juice if you want to avoid food coloring)
  • 1 tsp. Vanilla Extract
  • 1 tsp. Distilled White Vinegar
Frosting:
  • 1/2 Cup Butter (1 stick)
  • 8 oz Neufchatel or Light Cream Cheese
  • 2-3 Cups Powdered Sugar
  • 1 tsp. Vanilla Extract
Directions:

Cupcakes:
1. Preheat oven to 350 degrees F.  Place 24 muffin liners in 2 muffin pans.
2.  In a large bowl, combine the cake flour, cocoa powder, baking soda, baking powder, and salt.
3.  Using a mixer, whisk together the butter and sugar until fluffy, about 2-3 minutes.  Add in the eggs, one at a time (scraping sides of bowl as needed).  On low, whisk in the food coloring, vanilla, and vinegar.
4.  Add flour mixture and buttermilk in alternating batches (just easier for consistency--so it's not too difficult to mix and so it doesn't splash everywhere).  Mix on medium until well-combined.
5.  Pour batter into muffin liners about 3/4 of the way full.  Bake for 14-18 minutes, or until a toothpick comes out clean.  Cool completely.

Frosting:
1. Using an electric mixer, cream together butter and cream cheese until fluffy, about 2-3 minutes.  Reduce speed to low and add powdered sugar and vanilla, mixing until smooth.

Decorating:
1. Using a pastry bag and your preferred tip, pipe frosting onto cooled cupcakes.  I used a pastry bag with a Wilton #1 tip.  You can also cut a hole in a plastic/ziploc bag or even spread it on with a spoon or butter knife.  Top with red sprinkles, chocolate shavings, a piece of Valentine's Day candy, or whatever other creative topping you can come up with!

Enjoy!

Chocolate Sugar Cookies

In an attempt to be festive for Valentine's Day, I have been looking for some delicious new recipes to try out.  I came across chocolate sugar cookies and decided this would be perfect.  I found two great recipes and mine is a combination of the two: one from The Joy of Baking and another from Annie's Eats.  I also modified Martha Stewart's royal icing recipe by adding a little flavoring for the frosting.

If you haven't had a chance to try out chocolate sugar cookies, I strongly recommend you do!  They are a beautiful cookie and taste divine.  And although it might look like it takes a long time to make these cookies, they really don't take that long (or maybe the process is just fun and addictive).  They also make gorgeous gifts in a pretty box with a little parchment or tissue paper.  They should keep up to a week.


Ingredients:

Chocolate Sugar Cookies:
  • 1 1/2 Cups All-Purpose Flour
  • 2/3 Cup Cocoa Powder
  • 1/4 tsp. Salt (a pinch)
  • 1 tsp. Baking Powder
  • 1/2 Cup Unsalted Butter
  • 1/2 Cup Confectioner's Sugar
  • 1/4 Cup Granulated White Sugar
  • 2 Eggs
  • 1 tsp. Vanilla Extract
Royal Icing:
  • 4 Cups Confectioner's (Powdered) Sugar
  • 4 Tbsp. Meringue Powder (found at craft stores like Hobby Lobby, Wal-Mart, specialty cake shops or online)
  • 1/2 Cup Warm Water
  • 1 tsp. Vanilla Extract
  • Food Coloring (use gel to not affect the consistency of the icing), as desired
Directions:

Cookies:
1. In a medium-sized bowl, combine the flour, cocoa, salt, and baking powder.
2.  With an electric mixer (or your Kitchenaid), beat together the butter and sugar until light and fluffy, about 3 minutes.  Beat in the eggs, one at a time.  Then, beat in the vanilla.  
3. Gradually mix in the flour mixture until well-combined.
4.  Divide dough into two balls or discs and wrap with plastic wrap.  Refrigerate 1-2 hours, or until firm. 
5.  Remove half the dough from the refrigerator.  Preheat oven to 350 degrees F. On a lightly floured work surface, roll the dough out to 1/4-inch thickness.  Using your desired cookie cutter shapes, cut out the cookies.  
6.  Transfer the cookies onto a baking sheet.  NoteFor any cookies you do not want to frost, go ahead and sprinkle some colored sugar sprinkles on the cookies before baking. 
7.  Bake for 8-10 minutes.  Let cool for a few moments on the baking sheet (so you don't mess up the shape) then transfer to a wire rack to cool completely.  

Icing:
1.  With an electric mixer (or your Kitchenaid), slowly beat together the confectioner's sugar, meringue powder, warm water, and vanilla.  It's recommended to use a paddle attachment (the flat beater, not a wisk).  Beat on slow for 5-7 minutes, or until the icing is the consistency of thick honey.  If your icing is too thick, add a little more water.  If it is too thin, add a little more confectioner's sugar.
2.  Transfer to separate containers, one for each different color you plan to make.  Stir in food coloring.  Cover icing while not using it to keep the air out.

Decorating:
1.  Using a pastry bag with a small plain tip (I used Wilton #5, but you could also cut a small tip out of the end of a ziploc bag and pipe that way), pipe around the edges of the cookie to create a barrier for the rest of the frosting.  Your piping should be a little firmer consistency that what you'll use to "flood," or completely frost, the cookies.  It shouldn't be too thick that it takes an effort to get out of the bag though.  Let cookies sit for a few minutes to let the icing firm up. Note: I piped all the cookies in white frosting, but you could use the same colors to both pipe and frost the cookies.  
2.  Meanwhile, transfer the icing back to the containers (thin it out a little bit with a little water if you need to).  Using a spoon (that's what I did), or a squeeze bottle, or a plastic bag with a small tip cut out of the end, spread the frosting on the cookie, inside the piping.  It should spread to fill the cookie.  If you have any problems, use a toothpick to help spread the icing.  Let sit for the frosting to set.
3.  I cut a tiny tip in a plastic ziploc bag to do the wording on  my cookies, as I didn't have any Wilton tips smaller than #5 and that was too big for me.  Otherwise, decorate however else you want, with plain dots, words, or sprinkles! Although I didn't do them, check out the adorable marbled hearts, as seen in Annie's Eats.  Have fun and be creative!

Enjoy your beautiful creations!

Setting and Storing Tip: The cookies may take a while to set or dry (a good hour or two).  Once set, store them in an airtight container between layers of parchment or wax paper.  They should store for about a week.


Thursday, February 10, 2011

Cream-Filled Chocolate Truffles

With Valentine’s Day approaching, homemade candies make a great treat and a great gift!  Not only are they absolutely delicious, but they make a thoughtful and attractive gift with some cute boxes and tissue paper.  Everyone we've given them to has loved them.  

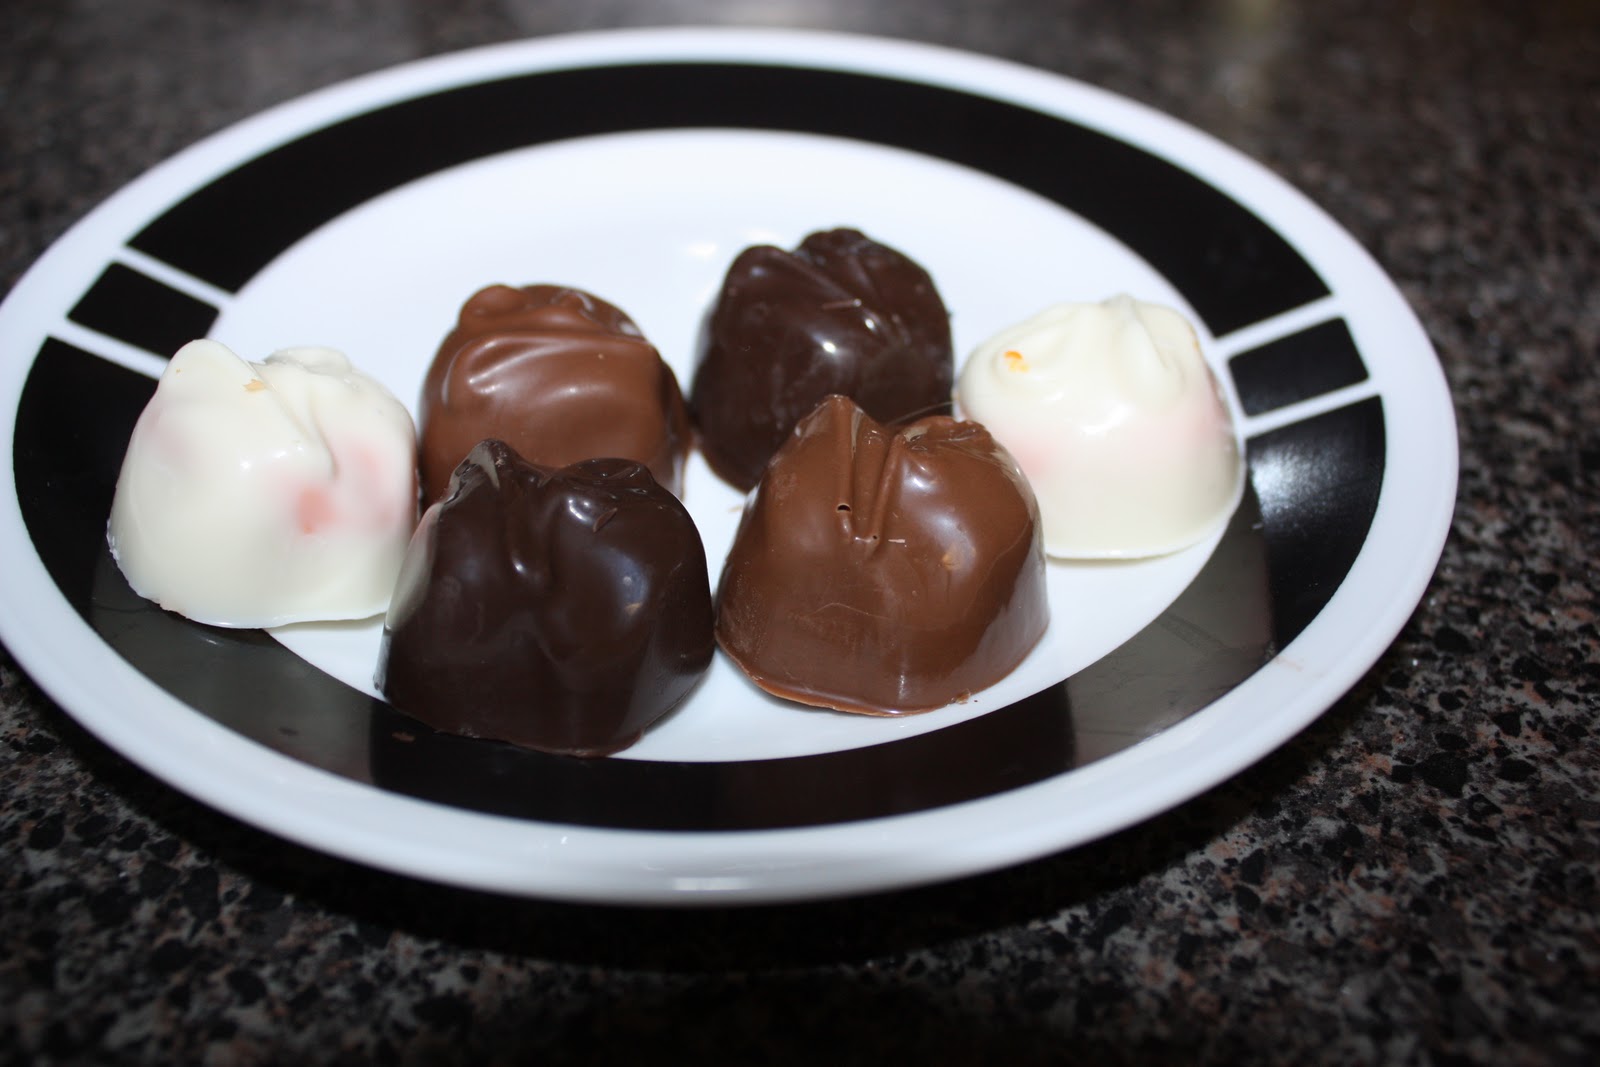
In this recipe, I made four different flavored truffles.  I made: White Chocolate Orange Crème Truffles, Dark Chocolate Blueberry Truffles, Milk Chocolate Hazlenut Truffles, and Milk Chocolate Raspberry Truffles.  Note that this recipe is great, because you can choose any flavor of filling you want, along with any flavor of chocolate (white, dark, or milk chocolate).  There are a number of combinations to choose from.

You'll need to stop by a cake/candy/baking store to pick up a truffle candy mold and the chocolate pieces.  You can also find dry fondant there.  I also get the flavoring there.  Flavorings will be oil-based in specialty shops, but generally alcohol-based in grocery stores.  Either is fine for truffle filling, but if you want to flavor the chocolates (not done in this specific recipe, but great for making Andes-like candy mints, etc), then you cannot use alcohol-based flavors or you'll ruin the chocolate (they won't mix and will clump together).  I went to Cakes Plus in Laurel, Maryland, but any cake/candy/baking store will do.

If you like this recipe and want to try making more homemade candies, you can also check out my Peanut Butter Cups and Chocolate Caramels recipes. 

Ingredients:


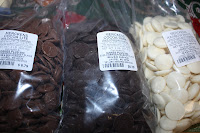
  • Dark Chocolate Pieces 
  • Milk Chocolate Pieces and/or
  • White Chocolate Pieces (I used all 3)
  • 3 Tbsp. Butter
  • 1 Tbsp. Milk
  • 1/2 Lb (8 oz) Dry Fondant (could substitute powdered sugar if you need to)
  • Food Flavoring of your choice (I used Blueberry, Raspberry, Chocolate Hazlenut, and Orange Crème)
  • Food Coloring of your choice


Directions
1.  Fill a medium skillet 1/3 full with hot water and simmer on stove top.  Fill a coffee cup with chocolate pieces and stir occasionally until they are melted (in the photo I have white chocolate, dark chocolate, and milk chocolate in cups, as I was making all three types of candy at once).


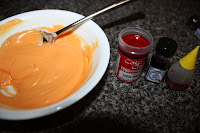
2.  While chocolate is melting, prepare filling.  Melt butter in a large bowl.  Stir in dry fondant and milk.  Separate into 4 (or however many flavors you have) smaller bowls.  Add in flavoring and food coloring and stir well, adding more to get to your desired filling color. 
3.  Spoon a small amount of chocolate into a candy mold and be sure to cover the sides, so no part of the mold is without chocolate (I just use the spoon for this and it works fine, but you can also use candy brushes if you so choose).  This may take some practice, to be sure you use as little chocolate as possible, while still covering all of the candy mold.  If you use too much chocolate, your candy will be hard to bite in to and you won't have adequate room for the filling.
4.  Place the candy mold flat in your refrigerator for 3-5 minutes, or until chocolate is set.
5.  Take a bit of the cream filling (small spoonfuls) and place into each individual candy mold.  Top with more chocolate to completely cover and fill the mold.  Lightly tap the entire candy mold on the counter when done, to remove any air bubbles.
6.  Place the candy mold back in the refrigerator for 5-7 minutes, or until completely set.  Remove from refrigerator, flip candy mold upside down on counter top and tap out each pieces. Remove any excess chocolate from the pieces.

Wa-La!  You have delicious cream-filled chocolate truffles!  Enjoy!


As a reminder, you can also make some homemade Peanut Butter Cups or Chocolate Caramels for a variety of homemade chocolate candies.

Chocolate Caramels

With Valentine’s Day approaching, homemade candies make a great treat and a great gift!  Not only are they absolutely delicious, but they make a thoughtful and attractive gift with some cute boxes and tissue paper.  Everyone we've given them to has loved them.  

In this recipe, I made milk chocolate caramels (although you could use dark chocolate if you prefer).

You'll need to stop by a cake/candy/baking store to pick up a caramel candy mold, chocolate pieces, and a giant hunk of caramel.  I went to Cakes Plus in Laurel, Maryland, but any cake/candy/baking store will do.

If you like this recipe and want to try making more homemade candies, you can also check out my Peanut Butter Cups and Cream-Filled Chocolate Truffles recipes.

Ingredients
  • Milk Chocolate Pieces
  • Hunk of Caramel


Directions
1. Fill a medium skillet 1/3 full of hot water and simmer on stove top.  Fill a coffee cup with chocolate pieces and stir occasionally until melted (in the photo, I have white, dark, and milk chocolate in cups, as I was making all three types of candy at once).
2.  While chocolate is melting, break caramel apart into small pieces (roughly roll into balls) that will fit easily inside the candy mold (they need to fit easily into the mold, because you'll also need room for the chocolate).  
3.  Spoon a small amount of chocolate into a candy mold and be sure to cover the sides, so no part of the mold is without chocolate (I just use the spoon for this and it works fine, but you can also use candy brushes if you so choose).  This may take some practice, to be sure you use as little chocolate as possible, while still covering all of the candy mold.  If you use too much chocolate, your candy will be hard to bite in to and you won't have adequate room for the caramel.
4.  Place the candy mold flat in your refrigerator for 3-5 minutes, or until chocolate is set.
5.  Take the caramel pieces and place into each individual candy mold.  Lightly press down on the caramel to fill the square space (not too hard or you'll crack the chocolate).  Top with more chocolate to completely cover and fill the mold.  Lightly tap the entire candy mold on the counter when done, to remove any air bubbles.
6.  Place the candy mold back in the refrigerator for 5-7 minutes, or until completely set.  Remove from refrigerator, flip candy mold upside down on counter top and tap out each pieces. Remove any excess chocolate from the pieces.

And now you have delicious, homemade chocolate caramels to enjoy or give as gifts!

Enjoy!

As a reminder, you can also view my Cream-Filled Chocolate Truffle recipe or Peanut Butter Cup recipe for more homemade candies to make along with the caramels!

Buffalo Chicken Dip

Here's a quick, easy, and tasty appetizer dip.  This makes a great crowd-pleasing dish for game nights (sorry I'm posting it after the Superbowl) and it's a unique, healthier twist on eating regular buffalo wings.  It's really quick and easy to make also, always a bonus!

I adapted this recipe from The Bitten Word, written by two local D.C. guys (whom I've never met) who make recipes from different food magazines.

Ingredients:
8 oz Neufchatel Cheese (or Light Cream Cheese)
1/2 Cup Light (Organic) Ranch Dressing (or Bleu Cheese Dressing)
1/2 Cup Wing Sauce
1 lb. Chicken Breasts (Cooked and Shredded)
3/4 Cup Shredded Monterrey-Cheddar Cheese or Part-Skim Mozzarella Cheese (or Bleu Cheese Crumbles if using Bleu Cheese Dressing)

Directions:
1. Preheat oven to 350 degrees F.
2.  In 8x8 Glass Baking Dish, or a 9-inch glass pie dish, use a fork to combine the Neufchatel (or Light Cream) cheese, ranch dressing, and wing sauce.
3.  Fold in shredded chicken and shredded cheese.  Stir the entire mixture until well combined.  Note: For the chicken breasts, I boiled them, then used two forks to shred the chicken.  
4.  Bake for 25-25 minutes, or until hot and bubbly.

Serve with celery sticks, water crackers, wheat crackers, pita chips, other cut-up veggies, or French bread slices.

Enjoy!

Wednesday, February 9, 2011

Crab-Topped Tilapia

Tilapia is one of my favorite dishes.  It's a healthy fish, low in calories and fat, and high in lean protein and omegas.  This recipe is super-quick and easy and is the perfect companion to Crab-Stuffed Mushrooms.


Ingredients:
1 lb. Tilapia , Thawed (about 4 small or 2 large fillets)
Crab-Mixture (from Crab-Stuffed Mushroom Recipe)

Directions:
1.  Preheat oven to 400 degrees. Spray a 9x13 baking dish with nonstick butter-flavored cooking spray (or, line a baking sheet with aluminum foil and spray with cooking spray).
2.  Place Tilapia fillets in the baking dish (or on baking sheet).  Using the topping from Crab-Stuffed Mushroom recipe to spoon mixture over the fillets.
3.  Bake in oven for 18-25 minutes, or until fish is opaque and flakes easily with a fork.

Enjoy!

Serve with a side of risotto, a nice green salad, broccoli, or over steamed spinach (I made it over spinach).  I would also recommend serving with the Crab-Stuffed Mushrooms as a great appetizer.

Crab-Stuffed Mushrooms

Stuffed mushrooms are a great appetizer.  They are healthy, delicious, and quick and easy to make.  Plus, they look gourmet and make an impression on your dinner guests (or husband in this case for me).  In addition, by making this appetizer, you are left with a great topping to use for chicken or fish.  See my Crab-Topped Tilapia recipe, which pairs nicely with the crab-stuffed mushrooms.


Ingredients:
10-15 Fresh Mushrooms (I used White Button Mushrooms; you could use 2 Portabellas instead)
3 Tbsp. Butter
1 Cup Diced or Shredded Crab Meat (or Imitation Crab Meat)
3 tsp. Lemon Juice
1 Egg, Beaten (or Egg White for the healthier route)
2 tsp. Oregano
2 tsp. Basil
1/2 Cup Italian Bread Crumbs
3/4 Cup Monterrey-Jack Cheese
1/4 Cup Dry White Wine

Directions:
1.  Preheat Oven to 400 degrees.  Spray a 9x13 baking dish with non-stick butter-flavored cooking spray.
2.  Remove stems from mushrooms (you should just be able to pull them out easily).  Dice stems into small pieces.
3.  In a skillet, over medium-high heat, cook butter and mushroom stem pieces for about 3-5 minutes.
4.  Remove from heat and add in the rest of the ingredients, minus the wine (i.e. crab meat, lemon juice, egg, oregano, basil, bread crumbs, and cheese).  Stir well to combine.
5.  Pour wine at the bottom of the baking dish.  Place mushroom caps, cavity-side up, in the baking dish.  Spoon the crab/breadcrumb/cheese mixture into each mushroom cap (see note below for the leftover mixture).
6.  Place mushrooms in oven and bake for 10-15 minutes, or until cheese is melted.  Serve warm.

Enjoy!

Leftover Crab Mixture
I always have a good amount of leftover mixture and found it to be a great topping to place on top of fish or chicken.  See my Crab-Topped Tilapia Recipe for a great main dish to accompany the crab-stuffed mushrooms and make a good use of the rest of the prepared mushroom filling.

Saturday, February 5, 2011

Guacamole

Superbowl Time!  A great anytime, or game-time, snack or appetizer is guacamole.  Guacamole is loaded with healthy fats and nutrients.  The primary ingredient are avocados, which contain healthy fats, dietary fiber, potassium, and vitamins K, B6, and C. Eating them has been shown to reduce your risk of breast and prostate cancer, heart disease and high cholesterol, and improve your eye health.  And of course, we can't forget the health benefits of tomatoes and the other ingredients in this quick and easy recipe.  I served it with multi grain tortilla chips and some red and green bell pepper strips.  Yum.

Ingredients:
3 Ripe Avocados, Peeled and Pitted (I used Organic Haas Avocados)
4 tsp. Lime Juice
1/4 Cup Onion (Fresh Red Onion is best, but I used Dried Minced--given my personal fresh onion aversion)
1 1/2 tsp. Garlic Powder
4 Tbsp. Fresh Cilantro (or 4 tsp. Dried Cilantro)
1 tsp. Black Pepper
1 tsp. Sea Salt
Optional: 7 shakes/dashes of Tabasco or other Hot Sauce for extra flavor and just a bit of spice (I definitely used it)
2 Roma Tomatoes, Diced

Directions:
1.  In large bowl, place Avocados and lime juice.  Combine well using a masher.
2.  Add in the onion, garlic, cilantro, pepper, salt (and Tabasco if you prefer).  Continue to combine with the masher.
3.  Fold in the diced tomatoes and stir well.
4.  Let sit for 45 minutes to an hour and serve!

Enjoy!

Storing Tip:  If you want, you can make this dip a day ahead of time and store in the refrigerator.  The acidic lime juice in the guacamole should keep the avocados from browning.  This way, it can be a make-ahead dip to relieve you of doing all your cooking in one day.