Tuesday, November 29, 2011

Tomato, Basil, & Mozzarella Panzanella

I love Panzanella.  My Pea Panzanella is to-die-for.  This recipe is a different take on the bread dish, with heart-healthy Mediterranean flavors.  The classic combination of tomato, basil, and Mozzarella come together in a different way, making for one tasty meal....actually, way beyond tasty.  My husband and I savored this dish--it is so so good.  Serve it as an entree or a side dish to a lean meat.
I adapted the recipe from one I found in Gourmet magazine.

Ingredients:
3/4 Loaf Italian or French Bread, cut into 1" pieces (1 day old is best)
1/4 Cup, plus 1 Tbsp. Extra-Virgin Olive Oil
1 tsp. Black Pepper
1 Garlic Clove, Minced
2 Tbsp. Balsamic Vinegar
2 Tbsp. Capers, Drained and Chopped.
15-16 oz Tomatoes, Cut into 1" pieces (or buy canned, diced, to save time--be sure to drain the juice)
8 oz. Fresh Mozzarella, cut into 1" pieces
6 oz. Diced Ham or Prosciutto (I just used deli sliced ham)
1/3 Cup Chopped Fresh Basil (3 Tbsp. Dried, but best to get fresh for this recipe)
1 Small Red Onion, thinly sliced (optional to add more flavor--I did not add--if you know my aversion to fresh onions, you understand).
Oh and ignore the lettuce in the photo at the right--we had a side salad with our meal, but the lettuce is definitely not a key ingredient.


Directions:
1.  Preheat oven to 375 degrees.  Spray a large baking sheet with nonstick cooking spray (or line with foil and spray that with cooking spray).
2.  In a large bowl, toss bread pieces with 1 Tbsp. oil and pepper.  Spread bread mix onto baking sheet into 1 layer.  Bake for 8-12 minutes, or until bread is lightly browned (outer part will be crunchy and the middle will still be a little soft).
3.  Whisk together the garlic, vinegar, capers, and remaining 1/4 cup oil in large bowl.
4.  Add bread, tomatoes, Mozzarella, ham, and basil to bowl and stir and toss well to cat.  Let flavors sit for 20-30 minutes, at room temperature, before serving.  Or, make a couple hours ahead of time and chill in refrigerator (then serve at room temperature).

Enjoy!

Baked Southwest Egg Rolls

After making my Baked Mozzarella Sticks, I was inspired to make more egg roll wrapper meals.  I've always loved Southwest Egg Rolls in restaurants, but know they are sinful for my health.  I decided to make my version of Southwest Egg Rolls, using healthy ingredients and baking them instead of frying.  These would make a great appetizer (great for fall football games!) or serve them as a vegetarian meal (that's what I did).  They were so good.  I'm looking forward to leftovers for lunch tomorrow. 

Ingredients:
2 Cups Frozen Corn, Thawed
1 Can (15 oz) Black Beans, Rinsed and Drained
1 Bag (10 oz) Frozen Chopped Spinach, Thawed and Squeezed Dry
2 Cups Shredded Mexi-blend cheese (Low or Non-Fat)
1 Can (4 oz) Diced Green Chilies, Drained
2 Tbsp. Chives (Green Onions)
2 Tbsp. Dried Cilantro (or 1/4 Cup Fresh Cilantro)
1 tsp. Cumin (Ground)
1 tsp. Chili Powder
1 tsp. Black Pepper
1 Package Egg Roll Wrappers, Room Temperature

Directions:
1.  Preheat oven to 400 degrees.  Combine all ingredients (minus the egg roll wrappers) in a large bowl and stir well thoroughly mix.  
2.  Lay an egg roll wrapper out on a work surface so that one of the corners is pointing toward you and put a large spoonful (about 1/4 cup) of the filling in the center.  
3.  Fold the tip closest to you up over the filling snugly.  You can add a few drops of water to make it stick better.
4.  Carefully (here is where it can sometimes break), fold the right and left sides in to the center (use a bit of water again if you desire).  
5.  Roll up the wrap and use a bit of water to seal it.  Repeat with the remaining filling and wraps.6.  Place the sealed egg rolls on the baking sheet (sprayed with cooking spray) seam side down.   Spray a little cooking spray on top of the egg rolls.
7.  Bake at 400 for 12-17 minutes, or until lightly brown, turning halfway through baking.  

Serve immediately, warm with fresh salsa and ranch sour cream dip.   
Enjoy!

Skinny Chicken Pot Pie

Chicken pot pie.  You either love it or hate it.  I hated this comfort dish with a passion growing up.  I remember when Mom was working or in school and it was Dad's night to cook (before I decided to learn to cook to help him out).  Pot pies were one of his things and I would literally cry my eyes out and go to bed hungry before I ate one.  I've decided to rediscover chicken pot pies twenty or so years later, giving it my own spin.  Inspiration for this recipe comes from Cooking Light's recipe, but I have significantly modified the recipe.  I changed a number of the vegetables they used, plus I used phyllo dough instead of puff pastry.  I LOVE phyllo dough (crispy, light, crunchy, yummy) and it is much much healthier than puff pastry.  The outcome was pretty tasty and makes a great dinner on a chilly evening or a night you're craving some hearty comfort food (without the hearty calories).

 Ingredients:
4 Cups Sodium-Free Chicken Broth
1 1/2 Cups Frozen Green Peas (Thawed)
2 Small Yellow or White Potatoes
1 Medium-Large Sweet Potato
4 Stalks Celery
3 Carrots
1 lb. Chicken Breasts (boneless, skinless)
2/3 Cup Whole-Wheat Flour
1 13/4 Cups Skim Milk
1/4 Cup Fresh Parsley (or 4 Tbsp. Dried)
1 tsp. Thyme
1 tsp. Black Pepper
1/3 Package Phyllo Dough (12 sheets)

Directions:
1.  Preheat oven to 400 degrees.  Bring chicken broth to a boil in a large stockpot.  Chop/dice potatoes, celery, and carrots.  Add to stockpot. Reduce heat to low, cover, and simmer for 10 minutes.
2.  Cut chicken (not cooked) into small 1-2" pieces.  Add to broth and cook for 5-10 minutes, or until chicken is cooked through.  Remove veggies and chicken from broth with a slotted spoon.  Set aside.
3.  Turn heat back up to medium and slowly add flour and milk to broth, whisking well.  Continue to cook about 5-10 minutes, or until thickened.
4.  Add chicken and veggies to the thickened broth.  Stir in parsley and black pepper.

5.  Spray a 13x9 baking dish with cooking spray.  Lay 6 phyllo sheets on the bottom of the dish.  Spoon mixture on top of phyllo dough.
6.  Carefully place remaining 6 sheets of dough over chicken mixture, and press the edges to the pan to seal in the chicken mixture.  Cut 3-4 small slits in the dough for steam to escape.  Spray with cooking spray.  Place dish on foil-lined baking sheet (just in case it bubbles over).
7.  Bake at 400 for 15-20 minutes, or until pastry is lightly browned and mixture is bubbling.

Serve hot and enjoy!
Note: if you plan on reheating leftovers (as we definitely had to do--then add a little bit of skim milk before reheating in the microwave so the reheated portion is not pasty).

Caprese Chicken

I love easy, healthy entrees.  This dinner is simple and straightforward to make, yet tastes totally gourmet and looks great too.  My husband's reaction was something along the lines of, "Wow, fancy," which means he was totally impressed.  Did I mention how healthy this meal is?  Lean protein, heart-healthy olive oil, basil, and red peppers in this Mediterranean dish.
Ok, false advertising...this is not really "caprese" chicken, as I used red peppers instead of tomatoes...but it looks very caprese-like.  And it tastes so good, so whatever I'm calling it, just try it.

Ingredients:
1 lb. Chicken Breasts (boneless, skinless; 3-4 breasts)
2 Tbsp. Balsamic Vinegar
3 Tbsp. Extra Virgin Olive Oil, Divided
1 Tbsp. Minced Garlic
1/2 Red Pepper, Cut into Strips
4 Basil Leaves
4 oz. Fresh Mozzarella, cut into 3-4 slices (one per chicken breast)

Directions:
1.  Marinade chicken breasts in balsamic vinegar, 2 Tbsp. of the olive oil, and the garlic for 2-3 hours.
2.  Grill chicken breasts, bake, or sautee on stovetop until cooked through (I baked at 350 for about 15-20 min).
3.  While chicken is cooking, heat remaining 1 Tbsp. olive oil in skillet.  Add red pepper strips and saute for 5-7 minutes, or until soft and cooked thoroughly.
4.  Place one chicken breast on a plate.  Top with a slice of Mozzarella, then basil leaf, then 3-4 red pepper strips.

Serve immediately and enjoy!

Sunday, November 20, 2011

Apple Cider Apple Cups

I saw the post on Gimme some Oven for cups made out of apples (!!!) and HAD to make these.  Seriously, you cut open apples and put in some homemade (or store-bought if you want) apple cider.  Genius.  Hot apple cider on a cold day, snuggled up on the couch, is one version of paradise.  You can also try putting caramel in these apple cups and serving apple slices to dip into it (Genius again!).  Here's a link on how to do the caramel apple thing.  It's on my to-make list once my son is old enough for that sort of treat (9 months is a little early for both sugar and crunchy food though).  These apple cups are not only edible when you're done, but super-cute, fun, and different.  Try making some for a party or just because.

Ingredients:
Apples
Apple Cider (Homemade, or Store-bought)
Lemon Juice
Cinnamon Sticks

Directions:

1. Cut tops off of apples and set aside.

2.  Use a paring knife to cut around the edge of the apple to make a "rim," about 1/4"-1/2" inch thick.
3.  Using a spoon, or melon-baller, scoop out the meat of the apple.  Brush a little lemon juice inside the apple to keep it from browning.
3.  If your apple sits lopsided, feel free to shave/cut a little bit off the bottom (as long as you don't cut through the apple for obvious leakage reasons).
4.  Fill with cider, add a cinnamon stick and Enjoy!!

Homemade Apple Cider


Hot apple cider is perfect on chilly fall and winter nights.  I had never tried making my own apple cider before, but saw a recipe (from my Pinterest obsession) on gimme some oven for apple cider served in apples and decided I had to try not only to make my own cider, but also to serve Hot Apple Cider in Apple Cups.
Plus, our home was just begging to be filled with the amazing smells of cinnamon, nutmeg, cloves, apples, and oranges.
So, I decided to modify the recipe I saw and go to the store to get my first cheesecloth (yep, first timer).  My main modification to the recipes I found is in terms of sugar.
[Aside: I figure that fruit is sweet enough and I don't like sugary juices, so why make a juice with sugar?  I included the optional sweetener and amounts in the ingredients, just in case you do want to make it with extra sugar.  However, I usually buy no-sugar-added juices, made with fruit only.  So, naturally, that is what I am making at home.]
The results were awesome and we enjoyed our homemade cider snuggled up on the couch.

Ingredients:
12 Medium Apples
1 Orange
4 Cinnamon Sticks
1 ts. Ground Cloves
1 tsp. Nutmeg
1 tsp. Allspice
Cheesecloth, or other fine strainer
Optional:
1/4 Cup Agave Nectar, Stevia, or other all-natural sweetener (or brown sugar if you want to use sugar).  Most recipes call for 1/2 cup to 1 cup sugar, so if you want it sweeter, go right on ahead.

Directions:
1.  Wash and cut apples and oranges into quarters (leave in stems/seeds/skin/etc).  Place in large stockpot.
2.  Add in cinnamon sticks, cloves, nutmeg, and allspice (and sugar/sweetener if you prefer).  Cover with water, filling the pot nearly to the top (minus 2-3 inches).
3.  Bring to a boil and boil, uncovered, for 1 hour.  Feel free to stir or mash (with a masher) or squeeze (with tongs), the fruit occasionally.
4.  Cover pot, reduce heat to low, and simmer for 2 more hours. Feel free to stir or mash (with a masher) or squeeze (with tongs), the fruit occasionally.
5.  Discard fruit from pot.  Filter the juice through a fine strainer (recommend a cheesecloth) and store in pitcher.

Serve hot with a cinnamon stick (cuddly blanket optional).

Enjoy!

Golden-Crusted Brussels Sprouts

I have to share this recipe with you for an absolutely delicious side dish.  Brussels sprouts are a fairly new love of mine and this recipe is so simple, easy, and healthy.  Plus, there are only 4-5 ingredients.  I have been making these often in the winter, ever since I had them prepared similarly at my friend Lindsay's--her also-awesome food blog is here.

Ingredients:
24 Brussels Sprouts, rinsed well
2 Tbsp. Olive Oil, divided
Sea Salt and Black Pepper, to taste
Parmesan Cheese, optional

Directions:
1.  Cut each Brussels Sprout in half, length-wise.  Drizzle 1 Tbsp olive oil over brussels sprouts and rub in.  Sprinkle with sea salt and pepper.
2.  Heat remaining 1 Tbsp. oil in extra-large skillet over medium-low heat.  Add in brussels sprouts, face-down, and cook for 4-5 minutes, or until lightly browned.  Stir them a bit and cook for 1-2 minutes longer.  Remove from heat and serve immediately (sprinkled with Parmesan cheese if you prefer).

Enjoy!

Tuesday, November 15, 2011

Taco Bites

It's Taco Tuesday! After making my Mozzarella Sticks, I had leftover eggroll/wonton wrappers that needed to be used.  So, I came up with a twist on tacos.  These were really easy and tasty.  I'm going to have to try them with other fillings.  Serve for dinner or even at a party as appetizers (they are sort of messy though).

Ingredients:
Wonton Wrappers
Taco Meat (Lean Ground Chicken or Turkey)
Shredded Cheese
Tomatoes
Lettuce
Cilantro
Sour Cream
Salsa (I used a Chipotle Salsa from Safeway, which was awesome)

Directions:
1.  Make taco meat (quick recap, brown meat, add chili powder/garlic/cumin/onion/paprika/water/cornstarch and simmer).  Preheat oven to 400 degrees.
2.  Place wonton wrappers in muffin pans.  Fill with meat and cheese.  Bake for 10-12 minutes, or until wrapper is lightly browned.
3.  Remove from oven and add remaining toppings.

Enjoy!

Buffalo Chicken Grilled Cheese Panini

I love Paninis and I love buffalo sauce.  I don't think I need to say much more than that.  I was inspired by Closet Cooking's version of this yummy sandwich.  It was a hit at our home and I hope you enjoy it too.  For more Panini recipes, check out my version of Panera's Turkey Artichoke Panini.

Ingredients:
Chicken
Wing Sauce (lowest sodium you can find)
Celery
Cheese
Ranch Sauce, for dipping

Directions:
1.  Cook chicken, shred, add hot sauce, celery, and cheese.  Stir well to combine (ez crockpot instructions for the chicken are here).
2. In you panini grill (or just regular saucepan, realizing most people don't have a panini maker), sprayed with nonstick cooking spray, place your sandwich on grill.  Cook for 4-6 minutes, or until heated through, cheese is melted, and bread is lightly browned.

Dip in ranch sour cream dip and Enjoy!

Shredded Buffalo Chicken

Shredded meats are a huge hit at our home--my husband loves to eat them and they are one of the easiest possible recipes to make.  Seriously, throw frozen chicken in a crockpot with some sauce and dinner is ready.  We usually eat BBQ Chicken, but I decided to try Buffalo Chicken tonight.  You can mix it up by turning this into a Buffalo Chicken Panini, if you're feeling gourmet (in photo above).  Or serve on crusty buns or a baguette.

Ingredients:
1 lb. Chicken Breasts (Frozen)
8-10 oz. Wing Sauce (lowest sodium you can find)

Directions:
1.  Place all ingredients in a crockpot or slow cooker.  Heat on low for 5-7 hours (or high for 2-4).  Once chicken is cooked through, you can pull the chicken apart with two forks.

Serve on crusty bread, or try it as a Buffalo Chicken Panini.

Goes well with baked fries, potatoes, rice, or just a green salad or veggies (carrots and celery) with Ranch Sour Cream Dip.

Enjoy!

Monday, November 14, 2011

Skinny Sweet Potato Skins

I've recently become a huge fan of Pinterest (and all other things that distract me from working on my dissertation--ha, funny, but also not funny).  While browsing food for inspiration, I came across these Healthy Sweet Potato Skins thanks to Pinch of Yum and just HAD to try them.  I love potatoes and this is a way to try a classic taste in a healthy way.  Feel free to serve these as a meal themselves (and even top with turkey bacon) or as a side dish paired with chicken or fish.  They would also make a great party appetizer.


Ingredients:
3 Sweet Potatoes
1 Tbsp. Extra-Virgin Olive Oil, plus more to spread on cooked skins
2 Tbsp. Minced Onion
1 Bag (6 oz) Baby Spinach, Fresh (rinsed and dried)
1/4 Cup (2 oz.) Light or Non-Fat Sour Cream
1/4 Cup (2 oz.) Light or Non-Fat Cream Cheese (I used whipped)
1 Cup Chickpeas/Garbanzo Beans
1/4 Shredded Mozzarella Cheese or Mexi-blend (Light or Non-fat)
Sea Salt and Black Pepper, to taste

Directions:
1.  Preheat oven to 350 degrees.  Stab (not to sound too violent) each potato multiple times with a fork.  Wrap each potato in foil.  Bake at 350 for 45-60 minutes, or until they are tender.
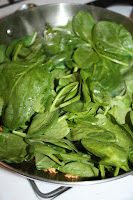
2.  Cut potatoes in half and let cool for 5-10 minutes.  Meanwhile, heat olive oil and onion over medium-high heat for 2-3 minutes.  Add in spinach and heat for an additional 2-3 minutes, or until spinach is cooked and starts to look wilted.  Remove from heat and set aside.
3.  Scoop out most of the sweet potato "meat" from the potato (leave a thin layer left).  Mix sweet potato "meat" with the sour cream and cream cheese until well-combined and mashed.  Add in the chickpeas, spinach, and sea salt and pepper (optional) (Also, watch out for baby hands, see photo at right).
4.  Spread a little bit of olive oil on the skins of the potatoes and Bake for another 5 minutes.  Remove from oven and fill each potato skin with the sweet potato mixture.  Top with Mozzarella cheese.
5.  Bake again for 10-15 minutes, or until cheese is melted and filling is heated.


Enjoy!