Tuesday, November 8, 2011

Black Bean, Ham, and Pumpkin Soup

I was digging through my cookbook...which is actually a huge binder, jam-stuffed with loose recipes (and some actually inserted into the binder).  It's a total mess (and here is a photo for you).  Anyway, I came across a recipe I made for the first Halloween party my husband and I hosted (in 2007--the year we met, aww, how sweet).  It is for Black Bean and Pumpkin soup...which might sound weird to you at first, but it was SO darn tasty...and it also looks really cool served at a Halloween party.  Although you an obviously serve it anytime.  It's a great, hearty soup for autumn.  It's also super-easy to make and so healthy for you.

Ingredients:
3 (15 oz) Cans Black Beans, Rinsed and Drained
1 (16 oz) Can Diced Tomatoes
2 Tbsp. Extra-Virgin Olive Oil
3 Tbsp.Minced Onion (or Chopped Onion, again, given my aversion, I go with minced)
3 Tbsp. Minced Garlic
1/2 tsp. Black Pepper
3 1/2 - 4 Cups Beef Broth (Sodium-Free)
1 (15 oz.) Can Pumpkin Puree
1/2 Lb. Ham, Cut Up (You can use either slices and cut into 1-2" squares, or buy a hunk of ham and cut into 1" cubes--your choice)
3 Tbsp. Sherry Vinegar

Directions:
1.  In a large bowl, use your immersion blender to puree 1/2 the beans and the tomatoes.  If you don't have an immersion blender (then go get one!), then you can just puree the beans/toms in your blender or food processor.
2.  Heat your crockpot to low heat.  Add in all of the ingredients, including the bean puree. (Aside: is it weird that EVERY time I say/write "all of the ingredients," I get all excited--given my blog title?  Ok, yes, it is weird, weirdly nerdy).
3.  Stir until well-combined, cover, and heat for 2-3 hours, or until hot and slightly thickened.

Serve immediately, topped with a dollop of sour cream (if you prefer), and Enjoy!

Skinny Strawberry Banana Muffins

The inspiration for these muffins was that it was time for breakfast and I was hungry.  I had some over-ripe bananas on my kitchen counter and a bag of frozen strawberries in the freezer just waiting to be used.  So, I searched a little bit online and found some recipes for Strawberry Banana Muffins.  I used Joy of Baking's recipe, but modified it a bit to make it a little healthier.  My version uses less butter, some applesauce, adds in whole-wheat flour, and uses a partial sugar substitute.  And they still taste awesome.
Serve these pretty muffins for a quick grab 'n go breakfast, an anytime-snack, as dessert, or for a party.

Ingredients:
1/4 Cup (1/2 Stick) Light Butter, Softened
1/4 Cup Applesauce
1/2 Cup Light Brown Sugar
1/4 Cup Agave Nectar (or substitute brown/white sugar if you don't have this)
2 Eggs
1 tsp. Vanilla Extract
1 1/4 Cup Ripe Bananas, Mashed (about 3 Bananas)
1 lb. Frozen or Fresh Strawberries, Cut into Bite-Size Pieces
3/4 Cup All-Purpose Flour
1 1/2 Cups Whole-Wheat Flour
1 1/2 tsp. Baking Powder
1/4 tsp. Baking Soda
1/2 tsp. Cinnamon

Directions:
1.  Preheat oven to 350 degrees.
2.  Line a muffin pan with paper liners (or you can spray the muffin cups directly with non-stick cooking spray.
3.  In a large bowl, combine the flours, baking powder, baking soda, and cinnamon.  Fold in the strawberries (coating them in the flour helps prevent sinking while baking).
4.  With your Kitchenaid, or other mixer, combine the butter, applesauce, brown sugar, and agave until well-combined.  Mix in the eggs, one at a time, and then the vanilla and the bananas.  Thoroughly mix.
5.  Slowly mix the strawberry-flour mixture in with the wet mixture.  Don't overmix.
6.  Pour batter into muffin cups.  Bake at 350 for 25-30 minutes, or until a toothpick inserted into the middle comes out clean.

Cool on wire rack and Enjoy!

Makes 12 Regular-Sized Muffins or 6 Jumbo-Muffins or 24 Mini-Muffins.

Freezer-Friendly: After baking and cooling, place muffins in a dated/labeled freezer bag.  Remove as much air as possible and freeze for up to 3 months.  To defrost, pop back into muffin pan and bake at 350 until warm, or defrost slightly in microwave.

Monday, November 7, 2011

Fish Tacos

A few weeks ago, I had Mahi Mahi fish tacos at The Chart House in Alexandria, Virginia.  Since then, I've been re-inspired to make my own version at home (I get inspired each time I eat fish tacos in a restaurant, but had yet to make them myself, until now).  I'm a huge fan of Tilapia, which I used in these tacos, because it is so versatile (not too fishy in terms of taste, mild, so you can make it with any flavors), is sustainable (good for environment and your health--less pollutants in the fish itself), and is very light and healthy.  This recipe makes for an amazingly healthy meal..and it tastes awesome.
This recipe is adapted slightly from Martha Stewart's.

Ingredients:
1/2 Cup Fat-Free or Low-Fat Sour Cream (organic)
3 Tbsp. Lime Juice
2 1/2 - 3 Cups Cabbage, Red or Green (I used green, pre-bagged)
2 tsp. Dried Chives (or 2-3 scallions, thinly sliced)
1/3 Cup Fresh Cilantro or 2 Tbsp. Dried Cilantro
2 tsp. Chili Powder
1/2 tsp. Cumin
1/2 tsp. Black Pepper
2 Tbsp. Extra-Virgin Olive Oil
1 tsp. Red Pepper Flakes
14-18 oz. Tilapia Fillets (or other white fish, like Mahi Mahi or Cod).
Black Pepper and Sea Salt, to taste
8 Tortillas (your preference what type--corn vs flour, I used whole-wheat flour ones)
Guacamole or just slices of Avocado (I served my guacamole, minus the tomatoes)


Directions:
1.  Mix together the sour cream and lime juice in a large bowl.  Place half of the mixture into a separate, small serving bowl and set aside.
2.  Add the cabbage, chives, cilantro, chili powder, cumin, and black pepper to the large bowl with the sour cream mixture.  Stir or toss well to mix together.
3. Cut each fish fillet into 4 strips length-wise and then cut each of those strips into 3 pieces (12 strips per fillet).  Season lightly with sea salt and black pepper (optional).
4.  Over medium high heat, warm olive oil and red pepper flakes in a large skillet.  Add half of the fish pieces and cook about 5-7 minutes (2-4 minutes on each side), or until fish is no longer opaque.
5.  Heat tortillas per your package's instructions.
6.  Fill each tortilla with fish and cabbage mix.  Top with reserved sour cream mixture and guacamole.  Serve immediately.

You could also add in some black beans or serve them on the side.

Enjoy!

Mango-Pineapple Daiquiris

I enjoy a good adult beverage, usually wine, but every once in awhile, I go for something different.  Usually those times are when I'm recalling my honeymoon in Jamaica and craving some fruity blended concoction.  Even on my honeymoon though, I had them make my drinks sans sugar.  Try this skinny daquiri when you're in the mood for a girly drink.   Pair with Mango Mahi Mahi.  Or serve at a party.  Or drink alone, by the pool, on vacation.  Or just on Wednesday...at noon.

Ingredients:
1/2 Cup Mango
1/2 Cup Pineapple
1/2 Cup Rum (any Rum is fine, Bacardi etc, 10 Cane is shown in this recipe's photo)
3 Tbsp. Triple Sec
3 Tbsp. Lime Juice
3 Teaspoons Sugar-Substitute (Stevia, like SweetLeaf)
Small Handful Ice Cubes

Directions:
1.  Place all ingredients in a blender.   Blend and serve.  Ahhh.

Also, good with plenty of other flavors--I like to add in Peach (another case of what to do with leftover baby purees).  Or, replace with good ol' classic strawberry for Strawberry Daiquiris 
Enjoy!

100 Recipes before 2012

So, I've imposed a goal of having 100 recipes posted before the New Year.  My pre-New Year's Resolution  is to post recipes like crazy to make my online cookbook bigger and better.  I am at 79 recipes right now.  That means I need to post 21 more recipes in the next month, a little less than 1 recipe per day.  That may not sound like a lot, but it is, especially when juggling a family and a dissertation (and my current stats of 1 new recipe every 9+ days).

Wish me luck and obviously, keep checking in for more tasty and healthy recipes!

Sunday, November 6, 2011

Butternut Squash & Apple Soup

More autumnal recipes!  I'm all about fresh, local, and organic ingredients (as I'm sure you know by now) and just bought a bunch of apples and squash for making baby food.  And again, I had plenty of leftovers, so I decided to come up with another fall soup.  Like my Carrot and Sweet Potato Soup recipe, this recipe is pretty simple in terms of number of ingredients and directions.
I looked around at a few different websites, and found a few different recipes for squash and apple soup.  Inspiration came from recipes by Food Network's Ina Garten and Emeril Lagasse.
I hope you enjoy it!

Ingredients:
1 Butternut Squash, Halved Lengthwise, Seeds/pulp removed
2 Apples (Granny Smith, McIntosh are good, but I actually used Fuji)
2 Cups Chicken Stock
2 Tbsp. Olive Oil
1 Tbsp. Minced Garlic
1 Tbsp. Minced Onion
1 1/2 tsp. Chili Powder
1 tsp. Black Pepper
Sour Cream, for garnish (optional)

Directions:
1.  Preheat oven to 350 degrees.  Place squash halves, skin side up, in glass baking dish.  Pour water, so about 1" sits in dish.  Place in oven for 40-50 minutes, or until squash is tender.
2.   Meanwhile, peel and core apples.  Slice and place in stockpot with chicken stock.  Set aside.
3.  In a large saucepan, heat the olive oil over medium heat.  Add in the minced garlic and onion.  Cook about 4-5 minutes.
3.  Add the onion and garlic mixture to the stockpot.  Bring to boil and stir for about 5-7 minutes, or until apples are tender.  Reduce heat to low.  Add in chili powder and black pepper.
4.  Remove squash from oven, flip squash over and scrape out the "meat."  Add all of the squash to the apple stockpot mixture.  Discard squash skins.
5.  Using a blender or immersion blender, puree the ingredients (you may need to work in batches).

Serve warm with a spoonful of sour cream in the middle.  Enjoy!

Freezer-Friendly:  You can also put this soup in dated/labeled freezer-bags and store in your freezer for up to 3 months.

Friday, November 4, 2011

Classic Homemade Pumpkin Pie

Happy (belated) Halloween everyone!  I wanted to make a pumpkin pie as a celebration for my son's first Halloween this past week.  He was dressed up as a toothless vampire, which was totally adorable by the way.  This recipe is inspired from memory from my Mom and Grandma and from various other recipes, such as this one on All Recipes. This is a truly homemade pie though and perfect for Halloween, Thanksgiving, Christmas, holiday dinners, and well, just because.

Ingredients:

Pie Crust
1 1/4 Cups (Organic) All-Purpose Flour (plus extra for floured surface/rolling out dough)
1/2 tsp. Sea Salt
1/2 tsp. Sugar
1/2 Cup (1 stick, 8 Tbsp) Unsalted Butter, Cold
4-6 Tbsp. Cold Water

Pie Filling
(some of the ingredients shown on the right)
2 Cups Fresh Pumpkin Puree or 1-15 ounce Can
1/2 Cup Light Brown Sugar
1/3 Cup White Sugar or Agave Nectar (as sugar substitute)
1/2 tsp. Sea Salt
2 Eggs (or Egg Whites/Substitute for lower cholesterol/calories)
2 tsp. Cinnamon
1/2 tsp. Nutmeg
1/4 tsp. Ground Cloves
1 tsp. Ginger
1/4 tsp. Allspice
1 1/2 Cups Evaporated Milk (Fat-Free)
(Note: you can substitute 4 tsp. Pumpkin Pie Spice--sold in stores--instead of all the spices separated out if you desire).

Directions:

Pie Crust
1.  Combine the flour, salt, and sugar in a small bowl or food processor.
2.  Using a food processor or blender, combine flour mixture and half the butter.  Mix for just 30 seconds.  Add second half of butter and mix for another 30 seconds.
3.  Add 3-4 Tbsp. Ice water, just enough so it's not too crumbly.
4.  On floured surface (or right there in the bowl--that's what I did), put dough into small disk.  Wrap in plastic wrap and refrigerate 30 min to 1 hour.
5.  Once dough is chilled, remove from refrigerator and place onto floured surface.  Roll out with floured rolling pin to roughly a 12" circle, about 1/8" thick.  Make sure dough is not sticking to surface (add more flour underneath, if it is).  You can instead put the dough between two pieces of wax/parchment paper (sprinkle flour on it as well) and roll it out that way.  Much easier and cleaner (that's what I did--see photo).
6.  Place dough on top of 9" pie dish or tin.  Remove excess dough hanging over pan, or fold under itself.  Make indentations on the crust if you desire, with your finger or fork.  Next step is for the filling, below.

Pie
1.  Preheat oven to 350 degrees.  To get your pumpkin puree, take a small-medium sized sugar pumpkin and cut in half (top and bottom).  This is by far the hardest part of the whole recipe, because these suckers are firm--if you get your pumpkin in half--way to go.  (I stick a knife in, wiggle/saw it for a bit, then pull it out and re-stick a few inches away until I was able to pull it apart).  Scrape out pulp and seeds (keep your seeds to bake Pumpkin Seeds).  Place cut side down on a foil-lined baking sheet.  Bake for 1 hour to 1 hour and 30 minutes (until skin is dimpling and pumpkin is soft).
2.  Increase oven temperature to 425 degrees.
3.  In your kitchenaid, or other blender, mix together the brown and white (or agave nectar) sugars, salt, and pumpkin spices.  Add in the eggs, one at a time.
4.  Slowly mix in the pumpkin puree and milk.  Make sure thoroughly combined, about 2-3 minutes.
5.  Pour pie filling into pie crust (a trick to prevent spills is to pull the rack of the oven out a bit and set the pie crust on it...then pour the filling in).  Bake at 425 for 15 minutes.  After 15 minutes, reduce heat to 350 and bake for 40-50 minutes or until a toothpick inserted in the middle comes out clean.
6.  Cool for 1-2 hours.

Top with whipped cream (optional) and enjoy!


Wednesday, November 2, 2011

Homemade Chicken Noodle Soup


It's that time of year--soups and comfort foods.  Among those is definitely chicken noodle soup.  It has amazing healing powers (science still doesn't fully understand why) and if made right, is very healthy (mainly watch the sodium--SALT).  My little baby boy had his first cold last week, at 8 months (and one week) old.  While he napped, I decided to make some homemade chicken noodle soup for him.  Well, most of it was for Mom and Dad, but I blended a little bit of it for the little babe.
I started making my own homemade chicken noodle soup a few years ago and have tweaked my recipe a few times until I have decided what I have below is exactly what I want.  Hope you love it!

Ingredients
:
Noodle Ingredients:


1/2 Cup All-Purpose (Unbleached Organic) Flour
1/2 Cup Whole-Wheat (Unbleached Organic) Flour
1/4 Tsp. Sea Salt
2 Tbsp. Water
1/2 tsp. Extra-Virgin Olive Oil
1 Egg

Soup Ingredients
:
3-5 lb. Whole Chicken
12 Cups Water
2 Chicken Bouillon Cubes or 2 tsp. Granulated Chicken Bouillon (sodium-free)
1/3 Cup. Chopped (or Minced) Onion
1 Tsp. Pepper
1 Bay Leaf
1 Cup Celery, chopped/sliced (about 4-5 stalks)
1 Cup Carrots, thinly sliced (about 4 medium carrots)
1 Batch Noodles (recipe below) or 2 Cup Egg Noodles (if you're feeling less ambitious)

Directions:
Noodle Directions:
1.  In a small bowl, combine flour and salt; combine well. 
2.  In another small bowl, beat together the water, oil, and egg.  Gradually combine the two to form dough.3.  On floured surface, knead dough until smooth, about 2-3 minutes. Wrap dough in plastic wrap and set aside at room temperature for1 hour.
4.  On floured surface, roll dough out as thin as possible into rectangle. Cut dough into thirds, lengthwise. Stack three pieces on top of one another (should not stick--should have plenty of flour).  Cut into 1/4" slices. Separate noodles and set aside on a platter, baking sheet or counter top at room temperature for 1-2 hours to dry somewhat.
5.  Start making soup.

Soup Directions:
1.  In 5 quart Dutch oven or large stockpot, combine chicken and water. Bring to a boil. 

2.  Reduce heat; cover and simmer 15 minutes. Skim off any fat that rises to the surface (I used a slotted spoon). 
3.  Add bouillon, onion, pepper and bay leaf. Cover again and simmer, for 40-55 minutes or until chicken is tender and started to come off the bone. 
4.  Remove chicken from broth and place onto cutting board.  Remove chicken from bones and cut chicken into bite size pieces.  Don't fret if a few pieces are pinkish and not quite done, the chicken is going back in the pot to cook longer (although my 4 lb bird was actually all done at 45 min). Skim fat from broth again. Return chicken to broth. 
5.  Stir in celery and carrots. Bring to a boil, reduce heat, cover and simmer 15 minutes or until carrots are crisp-tender. Remove bay leaf. 
6.  Bring to a boil again. Drop noodles into boiling soup. After soup returns to a boil, cook, uncovered for 7-10 minutes or until noodles are tender.


Enjoy!


Feel free to add a bit of flour to the broth to thicken it up, if you like it that way.  Also, feel free to mix in some dried parsley to your broth.  I usually do, but was out at the time I posted the recipe. 

Freezer-friendly:  Just store in dated/labeled ziploc bags in your freezer for up to 3 months.  


Oh and here is a photo of the soup pureed for my son, because I know you were curious to see what that looked like too. 


And here's a big bowl of the goodness...for adults.

Reese's Peanut Butter Blondie Bars

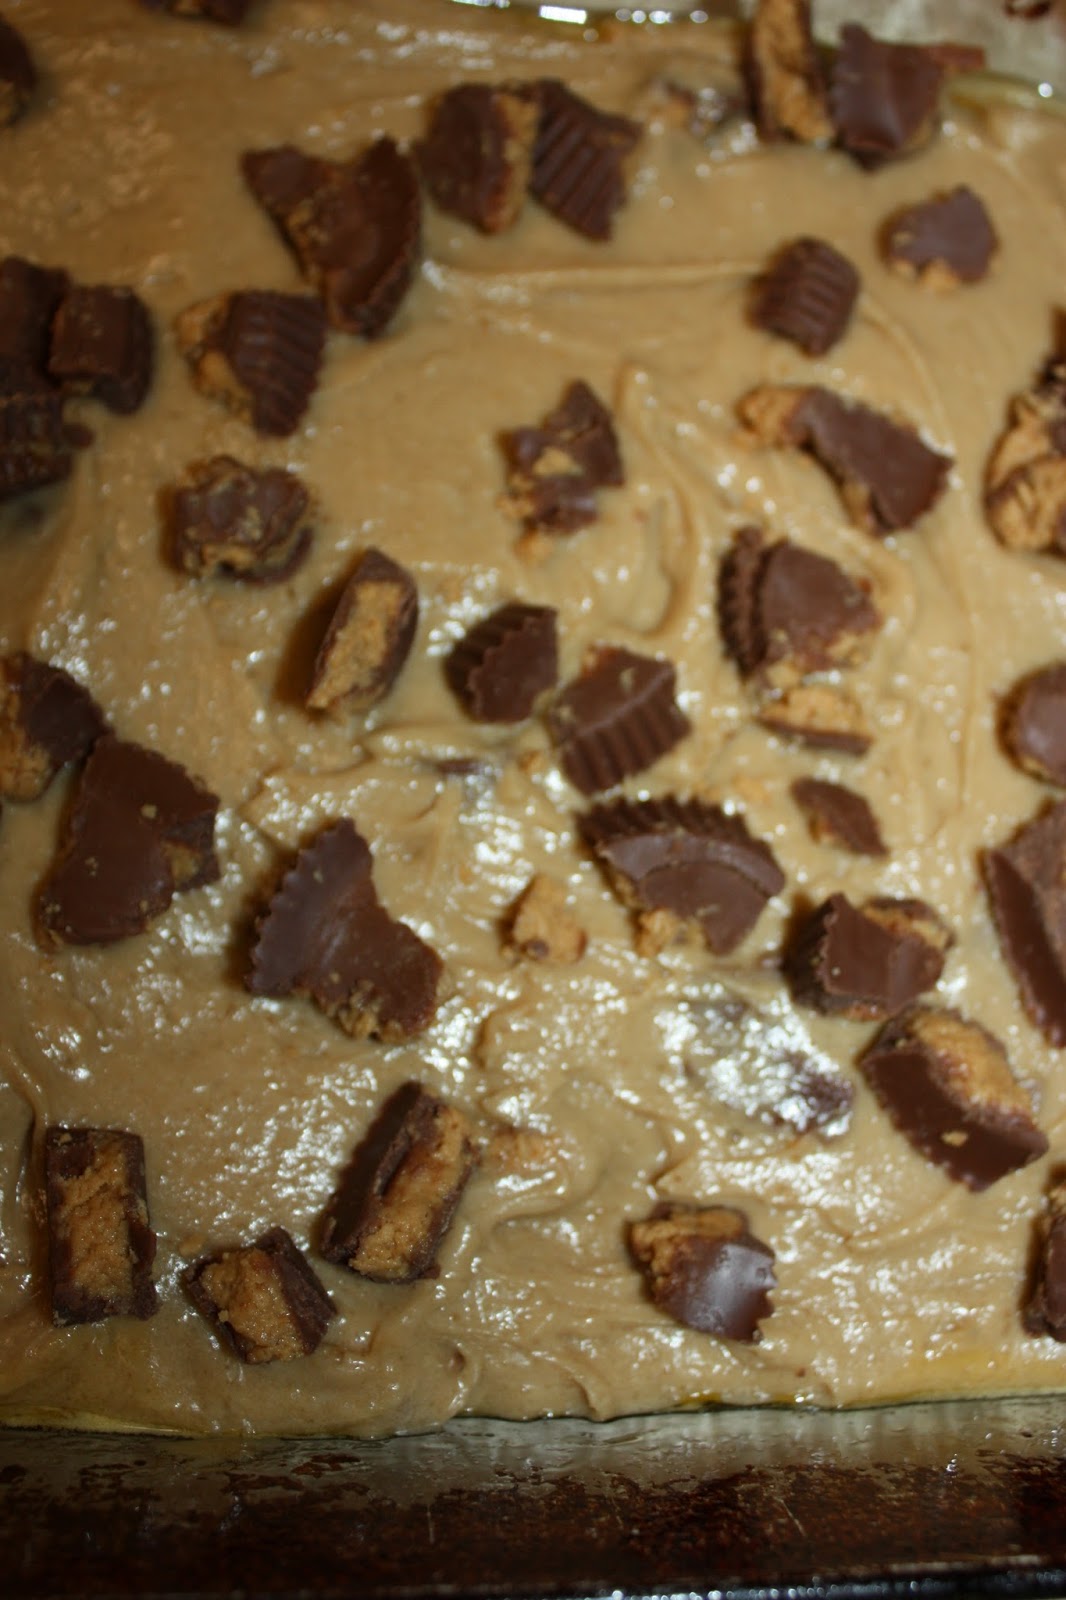
The day after Halloween, I stared into our still-heaping bowl of Halloween candy and decided to make some blondie bars featuring some of the candy.  Although the bars are a quick and easy sweet treat, I'm not sure it was a good idea to make them (because I keep eating them).  I used Reese's Peanut Butter Cups, but blondie bars are pretty versatile and you could use a variety of other types of candy (Snickers, Milky Way, M&Ms, and the list goes on).

Ingredients:
1 to 1 1/2 Cups Peanut Butter Cups, broke into pieces (I used 6 regular size cups broken up)
1 Cup All-Purpose Flour (could do half whole wheat flour to make a bit healthier)
1/2 tsp. Sea Salt
1/2 Cup (8 Tbsp.) Light Butter, softened
1/2 Cup Light Brown Sugar, packed
1/3 Cup White Sugar (or Agave nectar)
1 Egg
1 tsp. Vanilla Extract

Directions:
1.  Preheat oven to 350 degrees.  Spray a 8x8 glass baking dish with cooking spray (or line with parchment paper with 1" overhang).
2.  Mix together the butter and sugars until well-combined.  Add in the egg and vanilla extract and continue mixing.
3. Slowly mix in the flour and salt.
4.  By hand, stir in half of the peanut butter cup pieces.
5.  Spread batter into baking dish.  Sprinkle remaining peanut butter cup pieces on top.  Bake at 350 degrees for 40-45 minutes, or until edges are lightly browned and a toothpick inserted into the middle comes out clean.

Enjoy!

Ranch Sour Cream Dip

Here is a quick and tasty alternative to ranch and other chip dips and dressings.  This recipe is easy to make, low in calories and doesn't have all the extra sodium and preservatives in store-bought dressings and dips.  I actually came up with it after making my Buffalo Chicken Meatballs and realizing I had no ranch dressing (I prefer ranch over bleu cheese, personal preference) to dip them in.  So, I looked around in my refrigerator and cupboard for what I did have and came up with this recipe.  It is really tasty and a perfect complement to the spice in the wing sauce.  You could also serve it as a veggie dip, with chips or pita, on a baked potato, or as an alternative to sour cream for tacos or other Mexican-inspired dishes.  If you prefer a "heartier" (granted, it becomes less healthy) flavor, add in a bit of (light) mayonnaise.   

Ingredients:
1 Cup Low-Fat or Fat-Free Sour Cream (Organic)
1 tsp. Dill
1 tsp. Garlic Powder
1 tsp. Chopped Chives (I used dried instead of fresh)
1/2 tsp. Dried Parsley
1/2 tsp. Onion Powder
Sea Salt & Black Pepper, to taste

Directions:
1.  Combine all ingredients in a bowl and stir together, mixing well.

Serve and Enjoy!