Showing posts with label egg. Show all posts

Tuesday, December 20, 2011

Best-Ever Sugar Cookies

It's Holiday time!  That means time for me to go crazy making homemade candy (Cream-Filled Truffles, Chocolate Caramels), cookies, and other goodies (like my Hot Chocolate with Peppermint Chocolate Marshmallow Sticks).  I swear, if I ever quit my day job, it will be to open a place where I get to make these treats all of the time.

These sugar cookies have received rave reviews from anyone who eats them and after a little bit of tweaking, I finally think I have them just perfect.  This recipe yields about 60 cut-out cookies, which is just right for me to give some as gifts and leave some at home for us to nibble on.  The longest part of this process is the frosting, but it's fun (I cheesily blast Holiday tunes while I frost) and I look forward to a couple years from now when my son, Maxwell, can help me (instead of me frosting them while he naps).

I will admit that I wouldn't try to tweak the recipe to be healthier (shocking that I would say that, I realize), by adding whole wheat/less butter/other sweeteners or whatever, because I've been trying it for awhile and my results yield a mediocre cookie (using whole wheat flour) with less than stellar reviews.  So, enjoy this treat in moderation.

The frosting/icing recipe is found here (along with how to make Chocolate Sugar Cookies):

Ingredients:
1 1/2 Cups Butter, Softened
2 Cups White Sugar
4 Eggs
2 Tsp. Vanilla Extract (the real thing is better than imitation!)
4 1/2 Cups All-Purpose Flour (plus more for rolling out the dough)
2 Tsp. Baking Powder
1 tsp. Sea Salt

Directions:
1.  In a large bowl, cream together the butter and sugar until smooth.  Beat in eggs, one at a time.  Mix in the vanilla.
2.  Mix in the flour, sea salt, and baking powder (you might want to stir in the last cup by hand).
3.  Preheat oven to 400 degrees.
4.  Roll out dough (working with 1/3 the batter at a time) onto a floured surface.  Roll out the dough to 1/4" to 1/2" thickness.  Cut into shapes with cookie cutters.  Reroll scraps 2-3 more times and cut shapes into that (eventually dough will get too stiff and flour-y, so discard scraps after 2-3 re-rolls).
5.  Place cookies 1" apart on an ungreased cookie sheet.  Bake for 7-9 minutes, or until lightly browned on the bottom.  Transfer to wire rack to cool.

Serve plain or frost and decorate as desired (directions found here).

Enjoy!

Some Menorahs for my Jewish friends. 

Some Personalized Christmas Stocking Cookies

Sunday, November 13, 2011

Snicker Bar Cookies

In the spirit of using leftover (Halloween, or otherwise) candy to make bars or cookies, I decided to use up more of our leftover candy and make some Snickers Bar Cookies (if you're interested, see the recipe for Reese's Peanut Butter Blondie Bars here).
So, these awesome little morsels use Snickers candy bars with peanut butter cookie wrapped around them.  Then you drizzle a little chocolate icing on top and wa-la, a sweet treat.  Everything in moderation.  I won't put extra fats or sugars in most recipes, but I will always still post recipes for sweets.  I definitely enjoy unhealthy treats, but I believe a healthy lifestyle includes giving in to chocolate (and other sweets) every once in awhile.  Plus, you can always a modify a recipe by using light butter, agave (or other natural sweeteners), whole wheat flour (instead of all all-purpose), etc.   I hope you enjoy these!

Ingredients:
1/2 - 1 Package of Snickers Mini Snack Size Candy Bars (depending on how you cut them, see Directions #1).
3/4 Cup Light Butter (1 1/2 Sticks)
3/4 Cup Peanut Butter (I used organic and crunchy, but you can do whatever type you prefer)
1/4 Cup White Sugar
1/4 Cup Agave Nectar (or just use 1/2 Cup total White Sugar)
1/2 Cup Brown Sugar
2 Eggs
1 tsp. Vanilla Extract
2 Cups Whole Wheat Flour
1 Cup All-Purpose Flour
1 tsp. Baking Soda
1 tsp. Baking Powder
1/2 tsp. Sea Salt

Icing Ingredients:
1/4 Cup Cocoa Powder
1/2 Cup Powdered Sugar
1/2 tsp. Vanilla Extract
1/2 -1 Tbsp. Milk

Directions:
1.  Preheat oven to 350 degrees.  Cut candy bars in half or into fourths (I cut them into 4 pieces).
2.  Cream together the butter, peanut butter, and sugars.  Add in the eggs, one at a time, and the vanilla.
3.  Combine the dry ingredients in a separate bowl.  Slowly mix the dry ingredients in with the wet mixture (about 1 cup at a time).  Don't overmix, just until well-combined.
4.  Take a spoonful of dough and wrap around a piece of Snickers, roughly in a ball shape, completely covering the candy bar piece.  Place onto baking sheet about 2-3" apart.
5.  Bake for 10-12 minutes.  Cool on wire rack.

Icing Directions:
1.  Combine the icing ingredients (cocoa, powdered sugar, vanilla, and milk) in a small bowl.
2.  Drizzle over the cooled cookies.

Let dry and Enjoy!

Cauliflower-Crust Pizza

I love Pizza.  Let's just get that straight.  I also like to eat healthily, so I was so excited to see a recipe for pizza with a cauliflower crust.  That's right folks, a light, vegetable, low-carb, natually gluten-free crust.  Beth's blog, eat. drink. smile. was the inspiration for this Cauliflower Crust Pizza.  I've modified her recipe by preparing the cauliflower a little differently (mashing instead of "ricing") and it worked great.  This meal is loaded with veggies, herbs, healthy cheese, and lots of yumminess.  It has also reminded me that I haven't posted my awesome Mashed Cauliflower recipe yet (note to self to do so soon).

This recipe makes 2, 9" pizza crusts.  So, feel free to follow the recipe as is for two pizzas.  However, if you are looking for just one pizza, then do half of everything.  If you still want to use the entire head of cauliflower though, I recommend making some Mashed Cauliflower with the other half of the cauliflower and saving it for the next day.

Ingredients:
Yields 2 - 9" Pizza Crust
1 Large Head of Cauliflower
2 Cups Shredded Low-Fat Mozzarella Cheese (or Italian Blend)
2 Egg Whites
2 tsp. Dried Oregano
2 tsp. Garlic Powder
2 tsp. Dried Basil
Extra-Virgin Olive Oil, optional
*Pizza Sauce (or plain tomato sauce with garlic/oregano/basil added), Shredded Cheese, and Your Choice of Toppings

Directions:
1.  Remove stems and leaves from cauliflower.
Chop the florets into small chunks.
2.  In a saucepan over medium-high heat, bring 1 cup of water to a boil.  Add in cauliflower and cook for about 10-15 minutes, or until cauliflower is tender.  Drain cauliflower.
3.  Using a potato masher (or food processor), mash up the cauliflower.  Don't over-mash (or over-pulse) as you want texture and for it not to be a complete puree.
4.  Preheat oven to 450 degrees.  Spray a baking sheet with non-stick cooking spray.
5.  In a medium bowl, stir together 1 Cup of the mashed cauliflower, egg white, and cheese.  Stir in the oregano, garlic, and basil.
6.  Spread mixture into a 9" circle on the baking sheet.  Brush olive oil over the top of the mixture (optional).
7.  Bake at 450 for 15 minutes, or until lightly browned.
8.  Remove from oven.  Add sauce to crust, toppings (I used diced tomatoes and my Spinach and Artichoke Dip/Spread on one and ham/pineapple/pizza sauce on the other), and cheese.
9.  Bake at 450 for 5-10 minutes, or until cheese is melted.

Serve immediately and enjoy!


Tuesday, November 8, 2011

Skinny Strawberry Banana Muffins

The inspiration for these muffins was that it was time for breakfast and I was hungry.  I had some over-ripe bananas on my kitchen counter and a bag of frozen strawberries in the freezer just waiting to be used.  So, I searched a little bit online and found some recipes for Strawberry Banana Muffins.  I used Joy of Baking's recipe, but modified it a bit to make it a little healthier.  My version uses less butter, some applesauce, adds in whole-wheat flour, and uses a partial sugar substitute.  And they still taste awesome.
Serve these pretty muffins for a quick grab 'n go breakfast, an anytime-snack, as dessert, or for a party.

Ingredients:
1/4 Cup (1/2 Stick) Light Butter, Softened
1/4 Cup Applesauce
1/2 Cup Light Brown Sugar
1/4 Cup Agave Nectar (or substitute brown/white sugar if you don't have this)
2 Eggs
1 tsp. Vanilla Extract
1 1/4 Cup Ripe Bananas, Mashed (about 3 Bananas)
1 lb. Frozen or Fresh Strawberries, Cut into Bite-Size Pieces
3/4 Cup All-Purpose Flour
1 1/2 Cups Whole-Wheat Flour
1 1/2 tsp. Baking Powder
1/4 tsp. Baking Soda
1/2 tsp. Cinnamon

Directions:
1.  Preheat oven to 350 degrees.
2.  Line a muffin pan with paper liners (or you can spray the muffin cups directly with non-stick cooking spray.
3.  In a large bowl, combine the flours, baking powder, baking soda, and cinnamon.  Fold in the strawberries (coating them in the flour helps prevent sinking while baking).
4.  With your Kitchenaid, or other mixer, combine the butter, applesauce, brown sugar, and agave until well-combined.  Mix in the eggs, one at a time, and then the vanilla and the bananas.  Thoroughly mix.
5.  Slowly mix the strawberry-flour mixture in with the wet mixture.  Don't overmix.
6.  Pour batter into muffin cups.  Bake at 350 for 25-30 minutes, or until a toothpick inserted into the middle comes out clean.

Cool on wire rack and Enjoy!

Makes 12 Regular-Sized Muffins or 6 Jumbo-Muffins or 24 Mini-Muffins.

Freezer-Friendly: After baking and cooling, place muffins in a dated/labeled freezer bag.  Remove as much air as possible and freeze for up to 3 months.  To defrost, pop back into muffin pan and bake at 350 until warm, or defrost slightly in microwave.

Friday, November 4, 2011

Classic Homemade Pumpkin Pie

Happy (belated) Halloween everyone!  I wanted to make a pumpkin pie as a celebration for my son's first Halloween this past week.  He was dressed up as a toothless vampire, which was totally adorable by the way.  This recipe is inspired from memory from my Mom and Grandma and from various other recipes, such as this one on All Recipes. This is a truly homemade pie though and perfect for Halloween, Thanksgiving, Christmas, holiday dinners, and well, just because.

Ingredients:

Pie Crust
1 1/4 Cups (Organic) All-Purpose Flour (plus extra for floured surface/rolling out dough)
1/2 tsp. Sea Salt
1/2 tsp. Sugar
1/2 Cup (1 stick, 8 Tbsp) Unsalted Butter, Cold
4-6 Tbsp. Cold Water

Pie Filling
(some of the ingredients shown on the right)
2 Cups Fresh Pumpkin Puree or 1-15 ounce Can
1/2 Cup Light Brown Sugar
1/3 Cup White Sugar or Agave Nectar (as sugar substitute)
1/2 tsp. Sea Salt
2 Eggs (or Egg Whites/Substitute for lower cholesterol/calories)
2 tsp. Cinnamon
1/2 tsp. Nutmeg
1/4 tsp. Ground Cloves
1 tsp. Ginger
1/4 tsp. Allspice
1 1/2 Cups Evaporated Milk (Fat-Free)
(Note: you can substitute 4 tsp. Pumpkin Pie Spice--sold in stores--instead of all the spices separated out if you desire).

Directions:

Pie Crust
1.  Combine the flour, salt, and sugar in a small bowl or food processor.
2.  Using a food processor or blender, combine flour mixture and half the butter.  Mix for just 30 seconds.  Add second half of butter and mix for another 30 seconds.
3.  Add 3-4 Tbsp. Ice water, just enough so it's not too crumbly.
4.  On floured surface (or right there in the bowl--that's what I did), put dough into small disk.  Wrap in plastic wrap and refrigerate 30 min to 1 hour.
5.  Once dough is chilled, remove from refrigerator and place onto floured surface.  Roll out with floured rolling pin to roughly a 12" circle, about 1/8" thick.  Make sure dough is not sticking to surface (add more flour underneath, if it is).  You can instead put the dough between two pieces of wax/parchment paper (sprinkle flour on it as well) and roll it out that way.  Much easier and cleaner (that's what I did--see photo).
6.  Place dough on top of 9" pie dish or tin.  Remove excess dough hanging over pan, or fold under itself.  Make indentations on the crust if you desire, with your finger or fork.  Next step is for the filling, below.

Pie
1.  Preheat oven to 350 degrees.  To get your pumpkin puree, take a small-medium sized sugar pumpkin and cut in half (top and bottom).  This is by far the hardest part of the whole recipe, because these suckers are firm--if you get your pumpkin in half--way to go.  (I stick a knife in, wiggle/saw it for a bit, then pull it out and re-stick a few inches away until I was able to pull it apart).  Scrape out pulp and seeds (keep your seeds to bake Pumpkin Seeds).  Place cut side down on a foil-lined baking sheet.  Bake for 1 hour to 1 hour and 30 minutes (until skin is dimpling and pumpkin is soft).
2.  Increase oven temperature to 425 degrees.
3.  In your kitchenaid, or other blender, mix together the brown and white (or agave nectar) sugars, salt, and pumpkin spices.  Add in the eggs, one at a time.
4.  Slowly mix in the pumpkin puree and milk.  Make sure thoroughly combined, about 2-3 minutes.
5.  Pour pie filling into pie crust (a trick to prevent spills is to pull the rack of the oven out a bit and set the pie crust on it...then pour the filling in).  Bake at 425 for 15 minutes.  After 15 minutes, reduce heat to 350 and bake for 40-50 minutes or until a toothpick inserted in the middle comes out clean.
6.  Cool for 1-2 hours.

Top with whipped cream (optional) and enjoy!


Wednesday, November 2, 2011

Homemade Chicken Noodle Soup


It's that time of year--soups and comfort foods.  Among those is definitely chicken noodle soup.  It has amazing healing powers (science still doesn't fully understand why) and if made right, is very healthy (mainly watch the sodium--SALT).  My little baby boy had his first cold last week, at 8 months (and one week) old.  While he napped, I decided to make some homemade chicken noodle soup for him.  Well, most of it was for Mom and Dad, but I blended a little bit of it for the little babe.
I started making my own homemade chicken noodle soup a few years ago and have tweaked my recipe a few times until I have decided what I have below is exactly what I want.  Hope you love it!

Ingredients
:
Noodle Ingredients:


1/2 Cup All-Purpose (Unbleached Organic) Flour
1/2 Cup Whole-Wheat (Unbleached Organic) Flour
1/4 Tsp. Sea Salt
2 Tbsp. Water
1/2 tsp. Extra-Virgin Olive Oil
1 Egg

Soup Ingredients
:
3-5 lb. Whole Chicken
12 Cups Water
2 Chicken Bouillon Cubes or 2 tsp. Granulated Chicken Bouillon (sodium-free)
1/3 Cup. Chopped (or Minced) Onion
1 Tsp. Pepper
1 Bay Leaf
1 Cup Celery, chopped/sliced (about 4-5 stalks)
1 Cup Carrots, thinly sliced (about 4 medium carrots)
1 Batch Noodles (recipe below) or 2 Cup Egg Noodles (if you're feeling less ambitious)

Directions:
Noodle Directions:
1.  In a small bowl, combine flour and salt; combine well. 
2.  In another small bowl, beat together the water, oil, and egg.  Gradually combine the two to form dough.3.  On floured surface, knead dough until smooth, about 2-3 minutes. Wrap dough in plastic wrap and set aside at room temperature for1 hour.
4.  On floured surface, roll dough out as thin as possible into rectangle. Cut dough into thirds, lengthwise. Stack three pieces on top of one another (should not stick--should have plenty of flour).  Cut into 1/4" slices. Separate noodles and set aside on a platter, baking sheet or counter top at room temperature for 1-2 hours to dry somewhat.
5.  Start making soup.

Soup Directions:
1.  In 5 quart Dutch oven or large stockpot, combine chicken and water. Bring to a boil. 

2.  Reduce heat; cover and simmer 15 minutes. Skim off any fat that rises to the surface (I used a slotted spoon). 
3.  Add bouillon, onion, pepper and bay leaf. Cover again and simmer, for 40-55 minutes or until chicken is tender and started to come off the bone. 
4.  Remove chicken from broth and place onto cutting board.  Remove chicken from bones and cut chicken into bite size pieces.  Don't fret if a few pieces are pinkish and not quite done, the chicken is going back in the pot to cook longer (although my 4 lb bird was actually all done at 45 min). Skim fat from broth again. Return chicken to broth. 
5.  Stir in celery and carrots. Bring to a boil, reduce heat, cover and simmer 15 minutes or until carrots are crisp-tender. Remove bay leaf. 
6.  Bring to a boil again. Drop noodles into boiling soup. After soup returns to a boil, cook, uncovered for 7-10 minutes or until noodles are tender.


Enjoy!


Feel free to add a bit of flour to the broth to thicken it up, if you like it that way.  Also, feel free to mix in some dried parsley to your broth.  I usually do, but was out at the time I posted the recipe. 

Freezer-friendly:  Just store in dated/labeled ziploc bags in your freezer for up to 3 months.  


Oh and here is a photo of the soup pureed for my son, because I know you were curious to see what that looked like too. 


And here's a big bowl of the goodness...for adults.

Reese's Peanut Butter Blondie Bars

The day after Halloween, I stared into our still-heaping bowl of Halloween candy and decided to make some blondie bars featuring some of the candy.  Although the bars are a quick and easy sweet treat, I'm not sure it was a good idea to make them (because I keep eating them).  I used Reese's Peanut Butter Cups, but blondie bars are pretty versatile and you could use a variety of other types of candy (Snickers, Milky Way, M&Ms, and the list goes on).

Ingredients:
1 to 1 1/2 Cups Peanut Butter Cups, broke into pieces (I used 6 regular size cups broken up)
1 Cup All-Purpose Flour (could do half whole wheat flour to make a bit healthier)
1/2 tsp. Sea Salt
1/2 Cup (8 Tbsp.) Light Butter, softened
1/2 Cup Light Brown Sugar, packed
1/3 Cup White Sugar (or Agave nectar)
1 Egg
1 tsp. Vanilla Extract

Directions:
1.  Preheat oven to 350 degrees.  Spray a 8x8 glass baking dish with cooking spray (or line with parchment paper with 1" overhang).
2.  Mix together the butter and sugars until well-combined.  Add in the egg and vanilla extract and continue mixing.
3. Slowly mix in the flour and salt.
4.  By hand, stir in half of the peanut butter cup pieces.
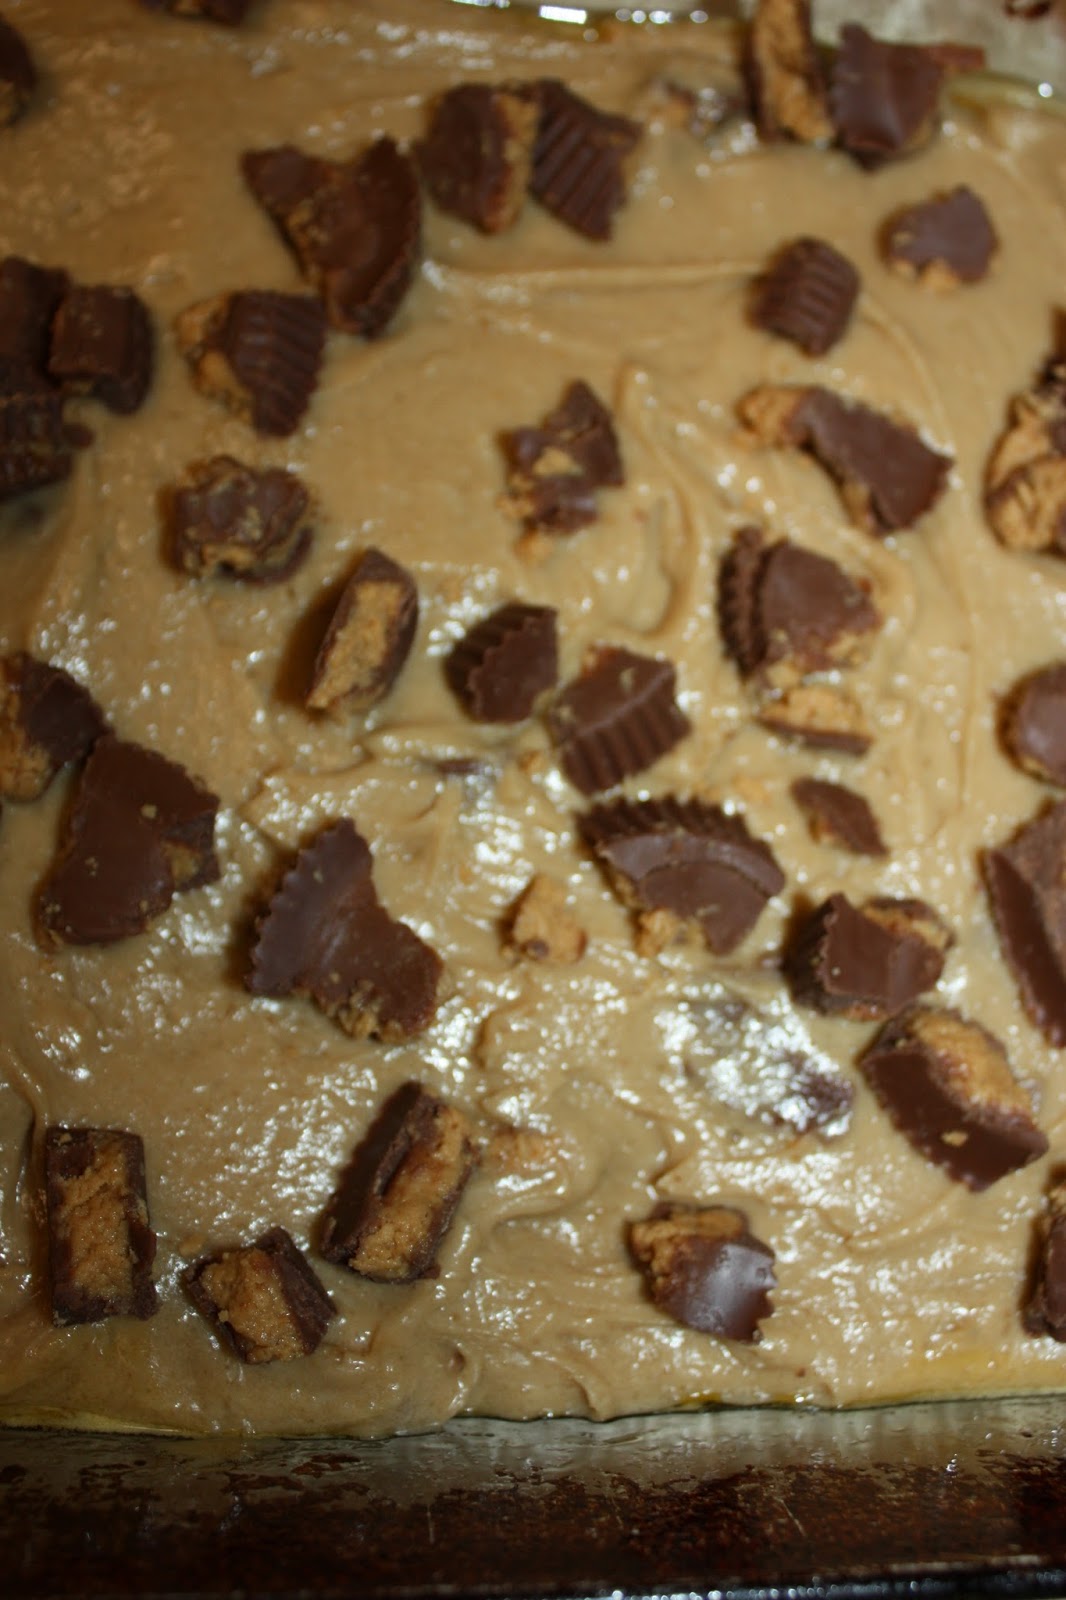
5.  Spread batter into baking dish.  Sprinkle remaining peanut butter cup pieces on top.  Bake at 350 degrees for 40-45 minutes, or until edges are lightly browned and a toothpick inserted into the middle comes out clean.

Enjoy!

Wednesday, October 26, 2011

Pumpkin Chai Tart & Tartletts

It is clearly fall now with the brisk, chilly air, the leaves beginning to fall, football, and Halloween coming up soon.  Fall is definitely a favorite season of mine.  With it, comes exciting food changes too.  I had an amazing Pumpkin Pie Chai Tea the other day at Mayorga Coffee and decided I needed to not only make a similar recipe at home--you can find the recipe for Pumpkin Pie Chai Tea (or latte) here.
Then, I realized I also had to make it in a pie (or a tart or tartlett).  Not only is this dish absolutely amazing in terms of deliciousness, but it's a great home air-freshener too (bake this and your place will smell awesomely like fall should smell). .
Note that I included photos of both a tart (large pie size) and tartletts (approx 6" across).  You could also make mini-tartletts...just modify your cooking times (the smaller they are, the less time they need to cook).

Ingredients:

Pumpkin Chai Filling
2 Cups Chai Tea, Strongly Brewed (I used 4 bags, steeped about 5-7 minutes)
8 Ounces Cream Cheese, Softened (Reduced or Non-Fat)
1/2 Cup Agave Nectar (or could just use White Sugar if you prefer)
1/2 Cup Sour Cream
1 Egg
2 Egg Yolks
2/3 Cup Pumpkin Puree (Fresh or faster route and do canned)
1/2 tsp. Salt
1 tsp. Vanilla Extract

Shortbread Crust
3/4 Cup Butter, Softened (1 1/2 sticks, Organic, of course)
1/2 Cup Powdered Sugar
1 tsp. Vanilla Extract
1/2 Cup All-Purpose (organic) Flour
1/2 Cup Rice (organic) Flour
1/4 tsp. Salt

Directions:

Pumpkin Filling
1.  Preheat oven to 350 degrees.  Put brewed Chai tea in a small saucepan over medium-high heat.  Bring a boil and reduce to 4-5 Tbsp.  Set aside and cool.
2. In a mixing bowl, cream together agave nectar and cream cheese.  Add sour cream and mix well.  Add eggs/yolks in, one at a time.
3.  Add pumpkin, salt, vanilla, and Chai tea reduction.  Stir together.
4.  Pour into tart pan lined with shortbread crust.
5.  Bake at 350 about 45-55 minutes, or just until set for large tart.  For tartletts, bake about 35-45 minutes, or until set (25-35 minutes for mini-tartletts).


Shortbread Crust
1.  Cream together the butter and powdered sugar.  Add in vanilla.
2.  Slowly add in the flour and salt, just until combined.
3.  Cover in plastic and set in refrigerator for about an hour.
4.  Once dough is back to room temperature, roll to 1/4" thickness and mold to tart pan.
5.  Bake once filled with Pumpkin Chai Filling.

Enjoy! Sprinkle with pumpkin pie seasoning, nutmeg, or cinnamon.  Top with whipped cream or chocolate shavings.  Best enjoyed on a chilly night, snuggled up, with a mug of pumpkin pie chai tea. :)

Wednesday, August 17, 2011

Chocolate Chip Pudding Cookies

Looking for a yummy cookie?  Try a twist on a traditional chocolate chip by using pudding.  Adding pudding mix gives the cookies a lot of texture and form (look great aesthetically), in addition, great flavor.  My Mom makes A-M-A-Z-I-N-G Chocolate Chip Pudding Cookies, and here is my version of them.  We are going to some friends' house tomorrow night and I needed a dessert option that can sit in the car all day, because I don't have time to come home (in a cooler though, just in case it gets super-hot).  Cookies are a perfect solution...and who doesn't love a good cookie?  I hope you enjoy them!

Ingredients:
1 3/4 Cup All-Purpose Organic Flour
3/4 Cup Whole-Wheat Organic Flour
1 tsp. Baking Soda
1/2 tsp. Sea Salt
1 Cup Organic Butter, Softened (2 Sticks)
1/4 Cup White Sugar
3/4 Cup Brown Sugar, Packed
1 Pkg. (4 oz) Instant Vanilla Pudding
1 tsp. Vanilla Extract
2 Eggs
1 Pkg. (12 oz.) Chocolate Chips

Directions:
1.  Preheat oven to 350 degrees.
2.  Combine flours, soda, and salt in a mixing bowl.  Set aside.
3.  Using your kitchenaid, or another mixer, beat together the butter, sugars, and vanilla pudding until fluffy.  Mix in the vanilla extract and eggs, one at a time.
4.  Slowly beat in the flour mixture, just until well-combined.
5.  By hand, stir in the chocolate chips (and nuts, if you choose to).
6.  Drop by heaping teaspoonful onto ungreased cookie sheet, about 2 inches apart.  Bake for 8-10 minutes.
Cool and Enjoy!